bootstrap treeview控件使用详解
1、依赖:
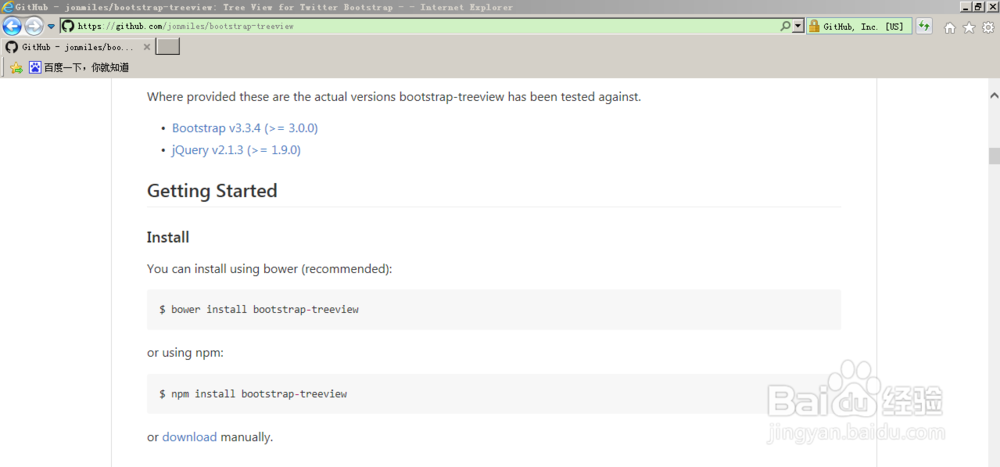
bootstrap-treeview需要依赖bootstrap和jquery两个框架,现在具体需要的框架版本到官方网站去查。
1、基本用法:
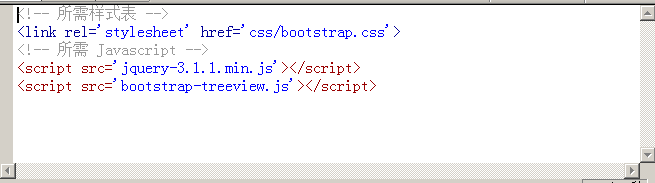
添加以下资源以使引导树视图正常工作。
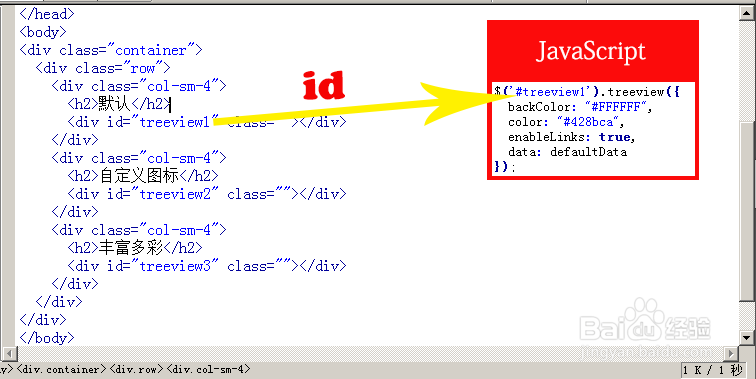
2、将组件绑定到任何现有的DOM元素。例如通过div标签的id绑定。
3、基本用法可能如下所示(JavaScript代码)

1、数据结构
为了定义树所需的层次结构,需要提供一个JavaScript对象的嵌套数组。
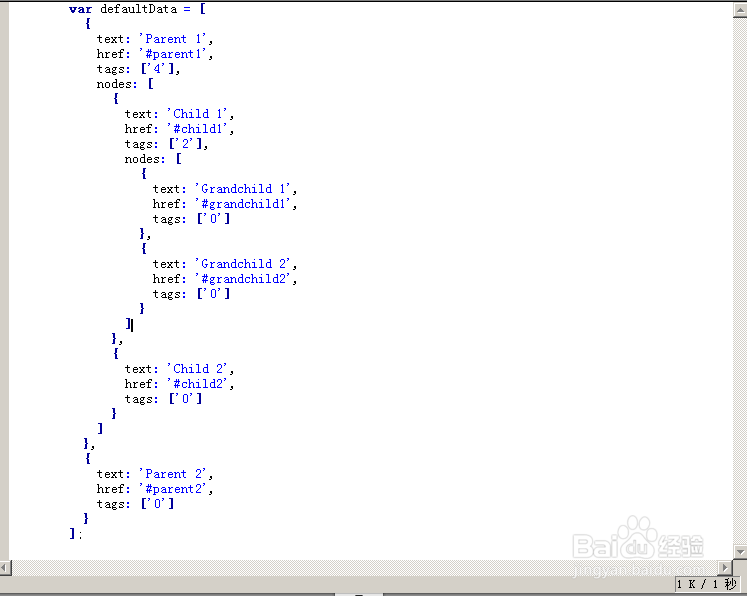
2、一个树节点被表示为一个简单的JavaScript对象。 这是一个必需的属性文本将建立一棵树。
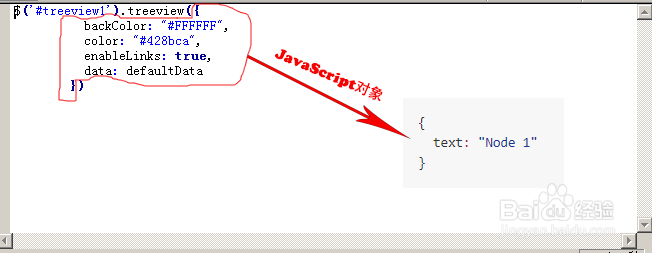
3、如果你想做更多,这里是完整的节点规范
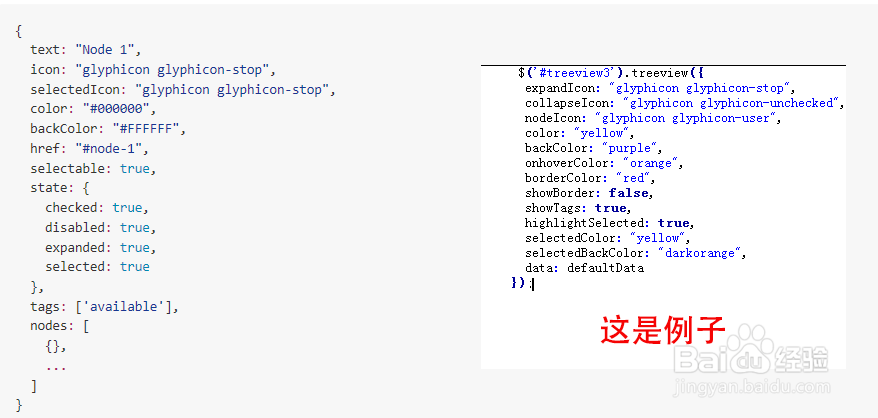
1、它的属性,方法等可以到官方网站或百度查:例如节点特定图标,颜色和标记等。
1、代码例子:
<!DOCTYPE html PUBLIC "-//W3C//DTD XHTML 1.0 Transitional//EN" "http://www.w3.org/TR/xhtml1/DTD/xhtml1-transitional.dtd">
<html xmlns="http://www.w3.org/1999/xhtml">
<head>
<meta http-equiv="Content-Type" content="text/html; charset=gb2312" />
<title>bootstrap-treeview.js 测试</title>
<link rel='stylesheet' href='css/bootstrap.css'>
<!-- your tests, any and all to run with the given fixtures below -->
</head>
<body>
<div class="container">
<div class="row">
<div class="col-sm-4">
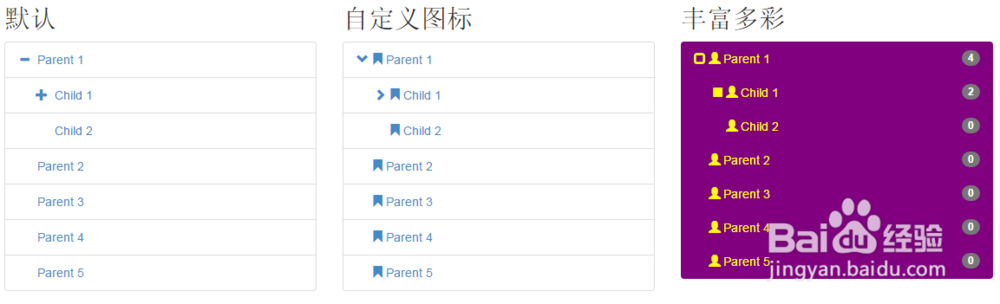
<h2>默认</h2>
<div id="treeview1" class=""></div>
</div>
<div class="col-sm-4">
<h2>自定义图标</h2>
<div id="treeview2" class=""></div>
</div>
<div class="col-sm-4">
<h2>丰富多彩</h2>
<div id="treeview3" class=""></div>
</div>
</div>
</div>
<script src='jquery-3.1.1.min.js'></script>
<script src='bootstrap-treeview.js'></script>
<script type="text/javascript">
$(function() {
var defaultData = [
{
text: 'Parent 1',
href: '#parent1',
tags: ['4'],
nodes: [
{
text: 'Child 1',
href: '#child1',
tags: ['2'],
nodes: [
{
text: 'Grandchild 1',
href: '#grandchild1',
tags: ['0']
},
{
text: 'Grandchild 2',
href: '#grandchild2',
tags: ['0']
}
]
},
{
text: 'Child 2',
href: '#child2',
tags: ['0']
}
]
},
{
text: 'Parent 2',
href: '#parent2',
tags: ['0']
},
{
text: 'Parent 3',
href: '#parent3',
tags: ['0']
},
{
text: 'Parent 4',
href: '#parent4',
tags: ['0']
},
{
text: 'Parent 5',
href: '#parent5' ,
tags: ['0']
}
];
$('#treeview1').treeview({
backColor: "#FFFFFF",
color: "#428bca",
enableLinks: true,
data: defaultData
});
$('#treeview2').treeview({
color: "#428bca",
expandIcon: 'glyphicon glyphicon-chevron-right',
collapseIcon: 'glyphicon glyphicon-chevron-down',
nodeIcon: 'glyphicon glyphicon-bookmark',
data: defaultData
});
$('#treeview3').treeview({
expandIcon: "glyphicon glyphicon-stop",
collapseIcon: "glyphicon glyphicon-unchecked",
nodeIcon: "glyphicon glyphicon-user",
color: "yellow",
backColor: "purple",
onhoverColor: "orange",
borderColor: "red",
showBorder: false,
showTags: true,
highlightSelected: true,
selectedColor: "yellow",
selectedBackColor: "darkorange",
data: defaultData
});
});
</script>
</body>
</body>
</html>
2、代码的浏览器效果