opencv3+python3进行图片平移
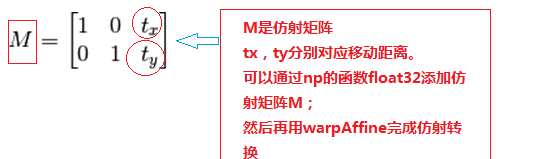
1、理论基础:B = M * A
M为矩阵,【[1,0,80],[0,1,-80]】
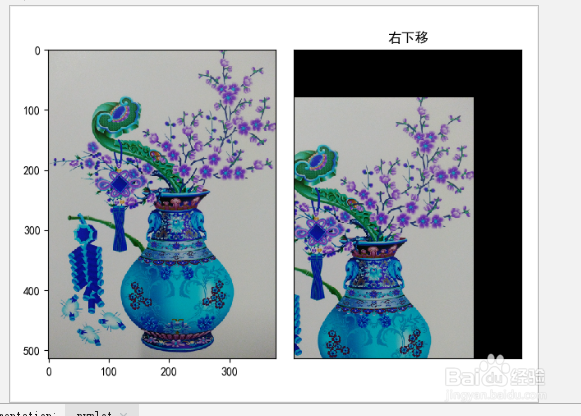
2、向右下移动代码:
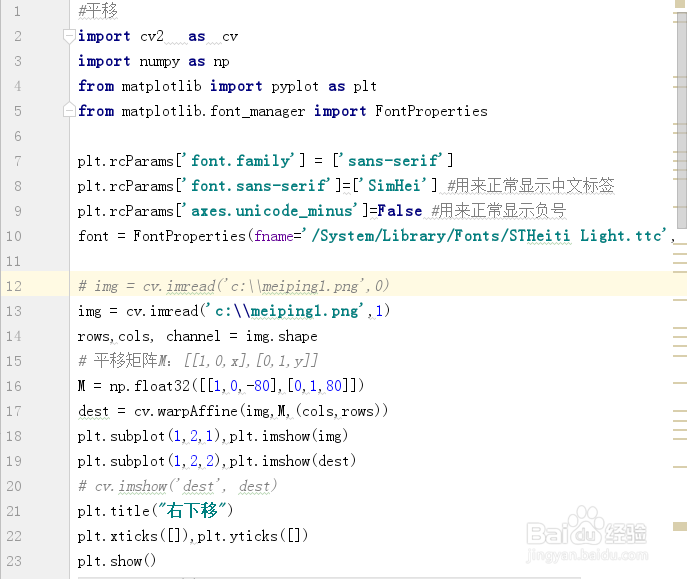
#平移
import cv2 as cv
import numpy as np
from matplotlib import pyplot as plt
from matplotlib.font_manager import FontProperties
plt.rcParams['font.family'] = ['sans-serif']
plt.rcParams['font.sans-serif']=['SimHei']
plt.rcParams['axes.unicode_minus']=False #显示负号
font = FontProperties(fname='/System/Library/Fonts/STHeiti Light.ttc', size=16)
# img = cv.imread('c:\\meiping1.png',0)
img = cv.imread('c:\\meiping1.png',1)
rows,cols, channel = img.shape
# 平移矩阵M:[[1,0,x],[0,1,y]]
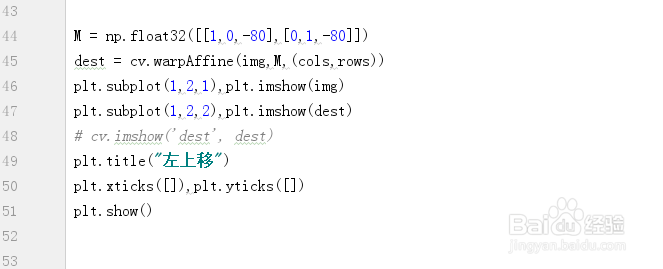
M = np.float32([[1,0,-80],[0,1,80]])
dest = cv.warpAffine(img,M,(cols,rows))
plt.subplot(1,2,1),plt.imshow(img)
plt.subplot(1,2,2),plt.imshow(dest)
# cv.imshow('dest', dest)
plt.title("左下移")
plt.xticks([]),plt.yticks([])
plt.show()
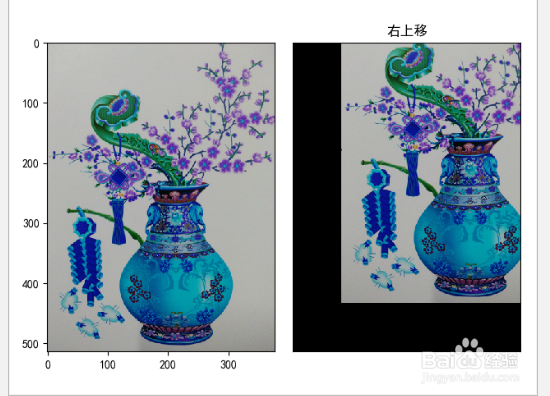
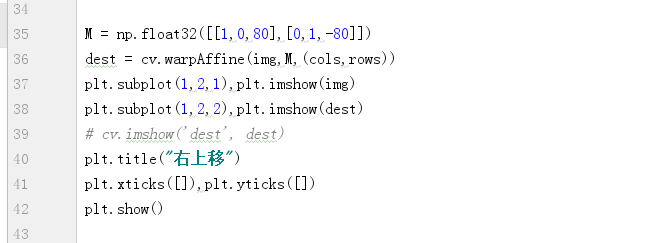
3、M = np.float32([[1,0,80],[0,1,-80]])
dest = cv.warpAffine(img,M,(cols,rows))
plt.subplot(1,2,1),plt.imshow(img)
plt.subplot(1,2,2),plt.imshow(dest)
# cv.imshow('dest', dest)
plt.title("右上移")
plt.xticks([]),plt.yticks([])
plt.show()
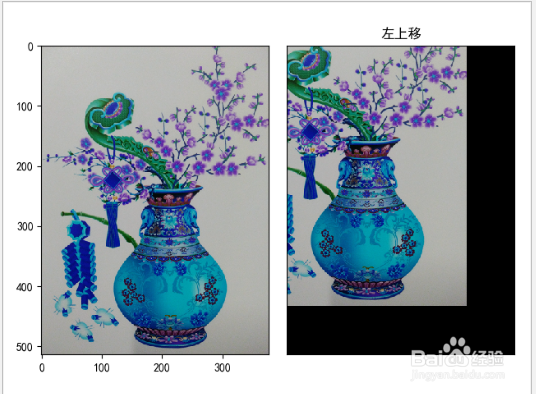
4、M = np.float32([[1,0,-80],[0,1,-80]])dest = cv.warpAffine(img,M,(cols,rows))plt.subplot(1,2,1),plt.imshow(img)plt.subplot(1,2,2),plt.imshow(dest)# cv.imshow('dest', dest)plt.title("左上移")plt.xticks([]),plt.yticks([])plt.show()
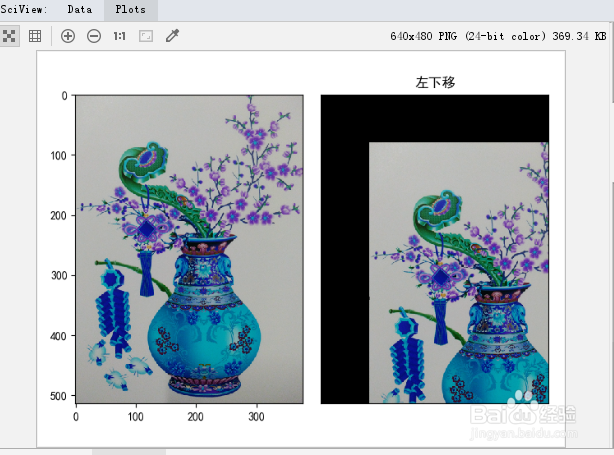
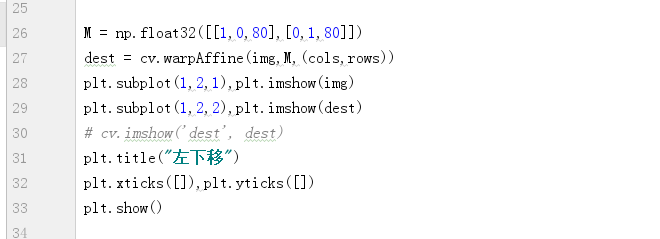
5、M = np.float32([[1,0,80],[0,1,80]])
dest = cv.warpAffine(img,M,(cols,rows))
plt.subplot(1,2,1),plt.imshow(img)
plt.subplot(1,2,2),plt.imshow(dest)
# cv.imshow('dest', dest)
plt.title("左下移")
plt.xticks([]),plt.yticks([])
plt.show()
6、小结:
float32[[1,0,80],[0,1,-80]]设置矩阵
warpAffine进行转换实现