Oracle数据库安装详细步骤
1、[root@localhost ~]# scp p13390677_112040_Linux-x86-64_2of7.zip root@10.10.0.163:/tmp/
解压
unzip p13390677_112040_Linux-x86-64_1of7.zip
unzip p13390677_112040_Linux-x86-64_2of7.zip

2、环境部署
yum install -y binutils compat-libstdc++-33 elfutils-libelf elfutils-libelf-devel gcc gcc-c++ glibc glibc-common glibc-devel libaio libaio-devel libgcc libstdc++ libstdc++-devel make numactl sysstat libXp unixODBC unixODBC-devel
用rpm –qa|grep 名字进行确认,需要的包是否已经安装
3、增加组和目录
groupadd oinstall
groupadd dba
mkdir -p /u01/oracle
[root@localhost ~]# groupadd oinstall
[root@localhost ~]# groupadd dba
[root@localhost ~]# mkdir -p /u01/oracle
添加一个oracle的用户,根目录是/u01/oracle,主的组是oinstall,
useradd -g oinstall -G dba -d /u01/oracle oracle
cp /etc/skel/.bash_profile /u01/oracle/
cp /etc/skel/.bashrc /u01/oracle/
cp /etc/skel/.bash_logout /u01/oracle/
[root@localhost ~]# cp /etc/skel/.bash_profile /u01/oracle/
[root@localhost ~]# cp /etc/skel/.bashrc /u01/oracle/
[root@localhost ~]# cp /etc/skel/.bash_logout /u01/oracle/
4、为oracle 用户设置密码
passwd oracle
[root@localhost ~]# passwd oracle
Changing password for user oracle.
New UNIX password:
Retype new UNIX password:
passwd: all authentication tokens updated successfully.
[root@localhost ~]#
ls –l
chown -R oracle:oinstall u01
ls –l
5、ls –l
发现权限已经修改成功了

6、检查nobody是否存在,id noboby
缺省存在,如果不存在,/usr/sbin/useradd –g nobody
修改sysctl.conf
Vim /etc/sysctl.conf
fs.aio-max-nr = 1048576
fs.file-max = 6815744
kernel.shmall = 2097152
kernel.shmmax = 1054504960
kernel.shmmni = 4096
# semaphores: semmsl, semmns, semopm, semmni
kernel.sem = 250 32000 100 128
net.ipv4.ip_local_port_range = 9000 65500
net.core.rmem_default=262144
net.core.rmem_max=4194304
net.core.wmem_default=262144
net.core.wmem_max=1048586
7、vim /etc/security/limits.conf
oracle soft nproc 2047
oracle hard nproc 16384
oracle soft nofile 1024
oracle hard nofile 65536
修改并添加
vim /et c/pam.d/login
session required pam_limits.so
设置oracle用户环境变量
[root@localhost ~]# su - oracle
[oracle@localhost ~]$
[oracle@localhost ~]$ pwd
/u01/oracle
[oracle@localhost ~]$
[oracle@localhost ~]$ ls -1a
.
..
.bash_logout
.bash_profile
.bashrc
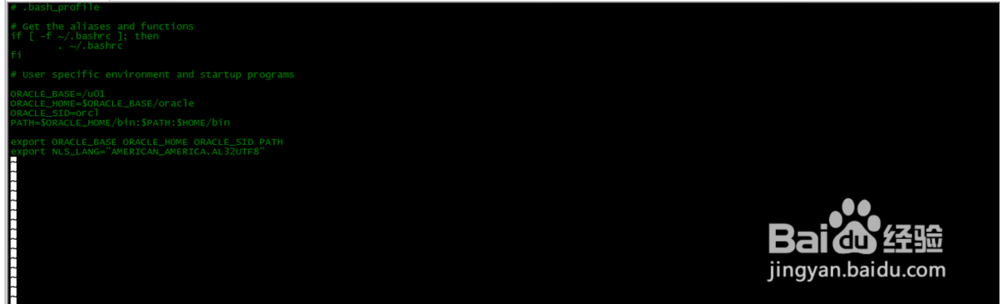
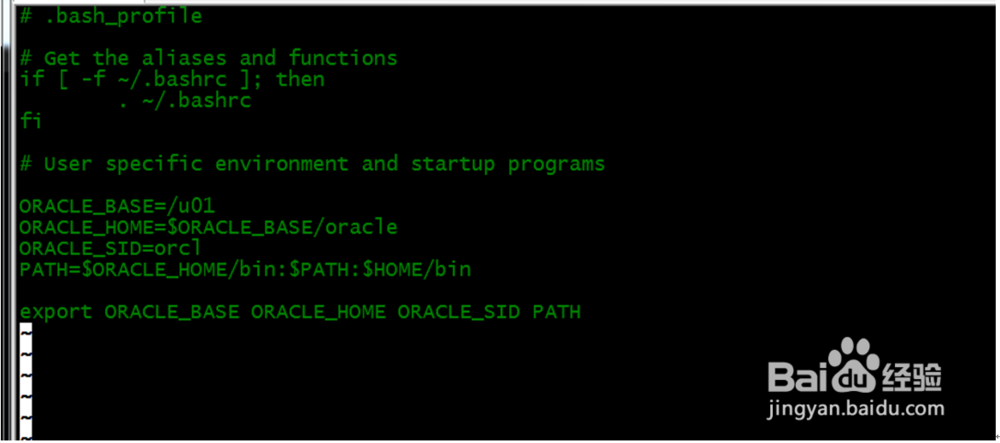
Vim .bash_profile
ORACLE_BASE=/u01
ORACLE_HOME=$ORACLE_BASE/oracle
ORACLE_SID=orcl
PATH=$ORACLE_HOME/bin:$PATH:$HOME/bin
export ORACLE_BASE ORACLE_HOME ORACLE_SID PATH
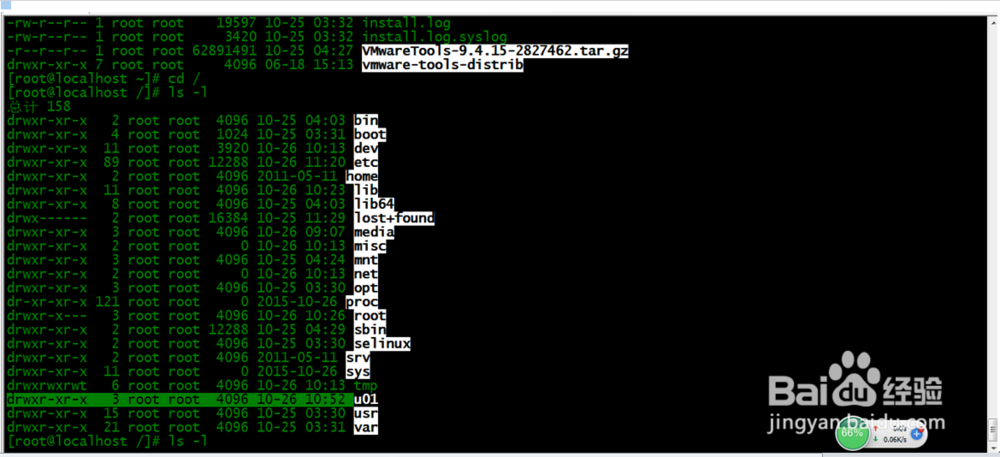
8、mv database /u01/

9、root@localhost u01]# chown -R oracle:oinstall database/
[root@localhost u01]# ls -l
总计 8
drwxr-xr-x 2 oracle oinstall 4096 10-26 17:07 database
drwxr-xr-x 2 oracle oinstall 4096 10-26 16:45 oracle
[root@localhost u01]#
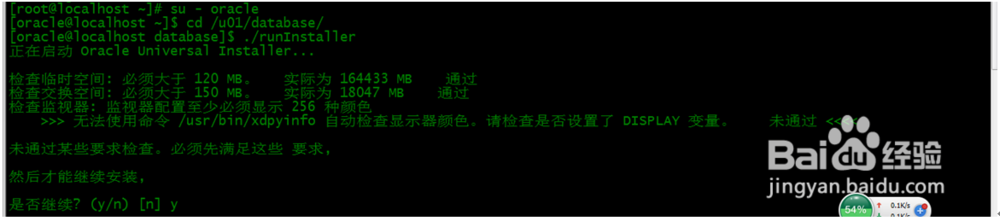
使用oracle帐号 登录图形界面进行安装
运行终端 Terminal
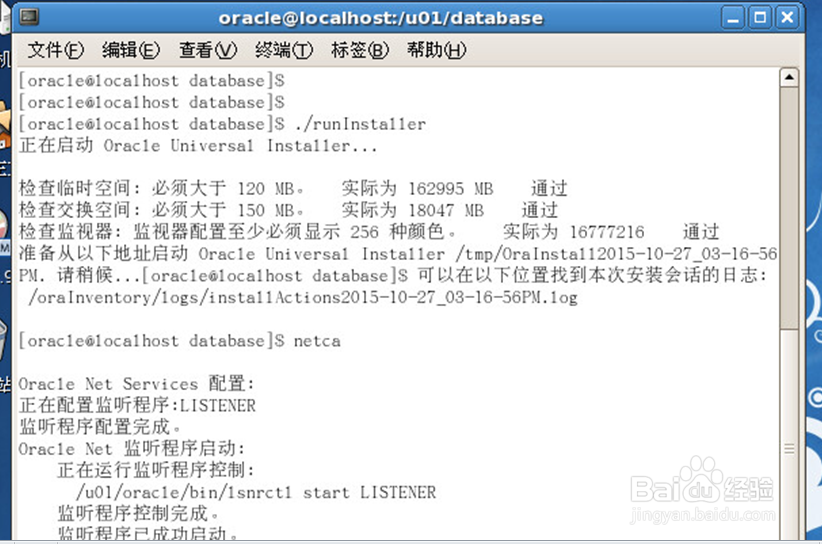
Cd /u01/database
./runInstaller
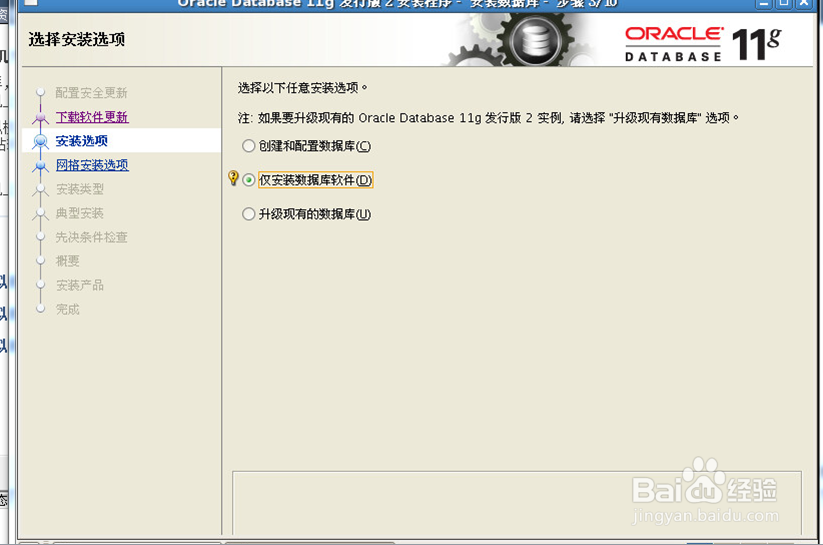
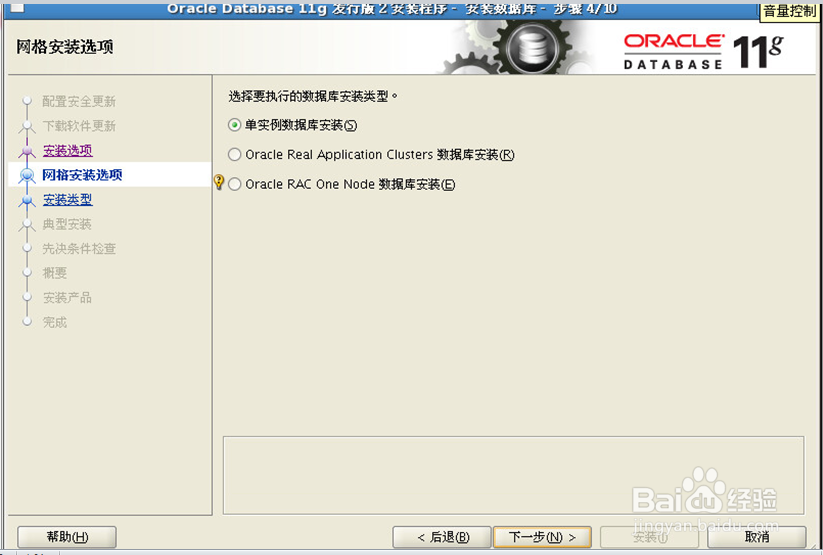
选择server服务器类型
Single 不需要 群集
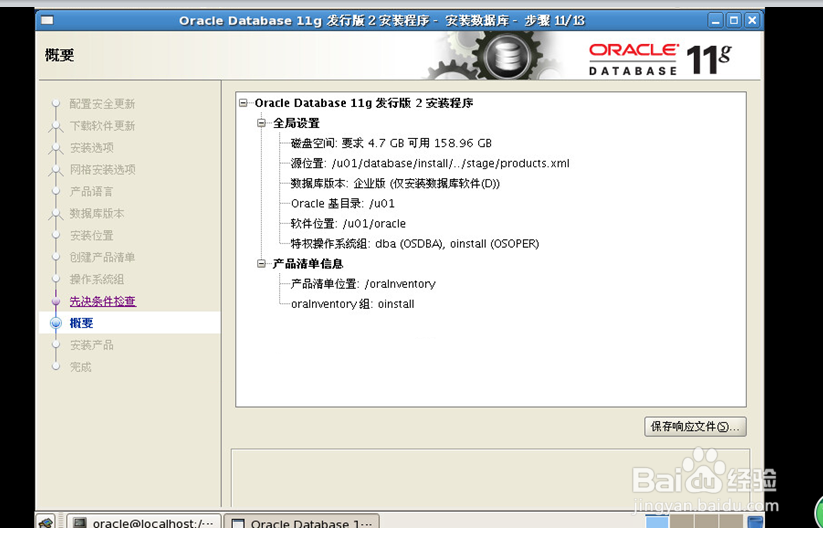
安装,选择 高级安装
语言,默认英语就可以 下一步
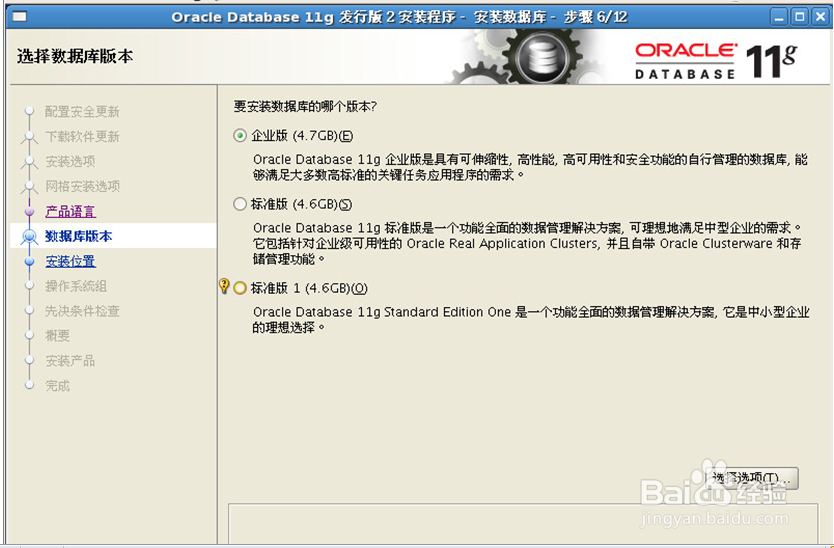
安装Enterprise版本
Oracle Base:/u01


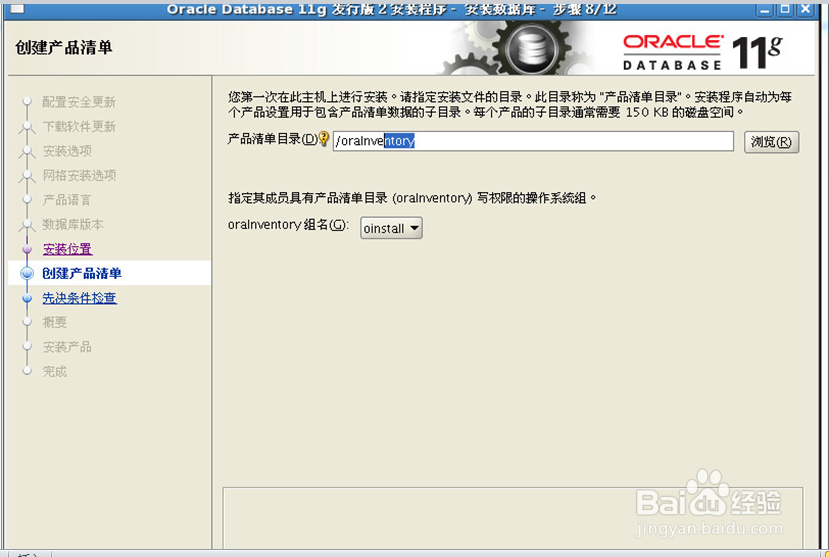
10、建目录
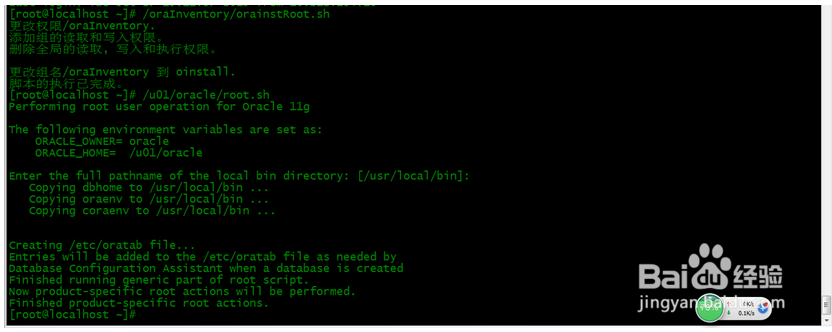
mkdir /oraInventory
chown -R oracle:oinstall oraInventory


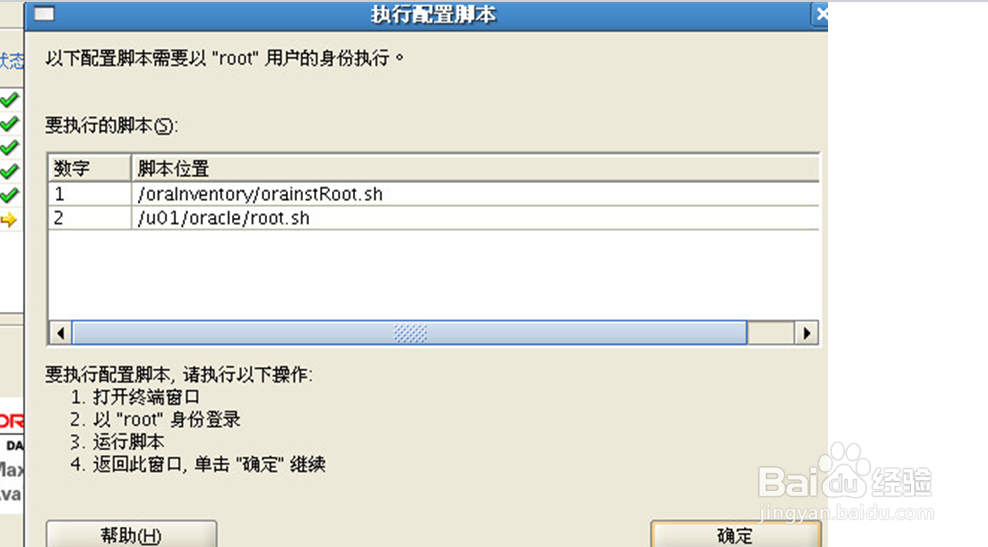
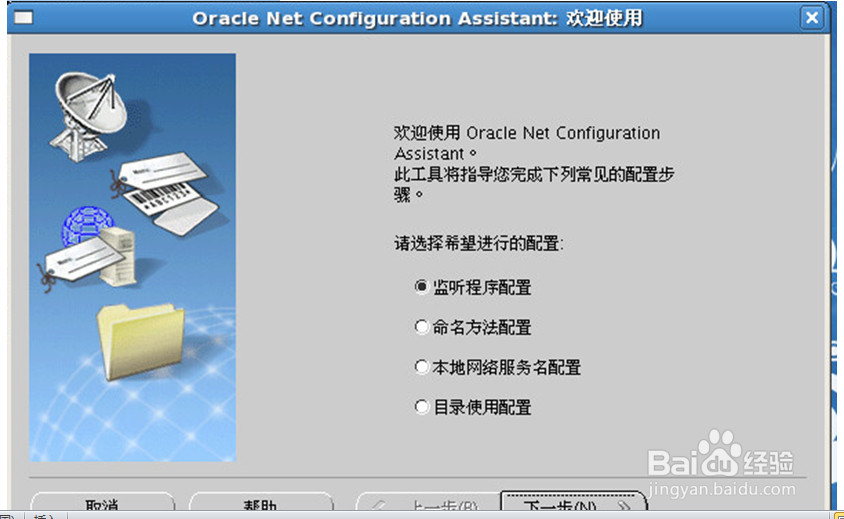
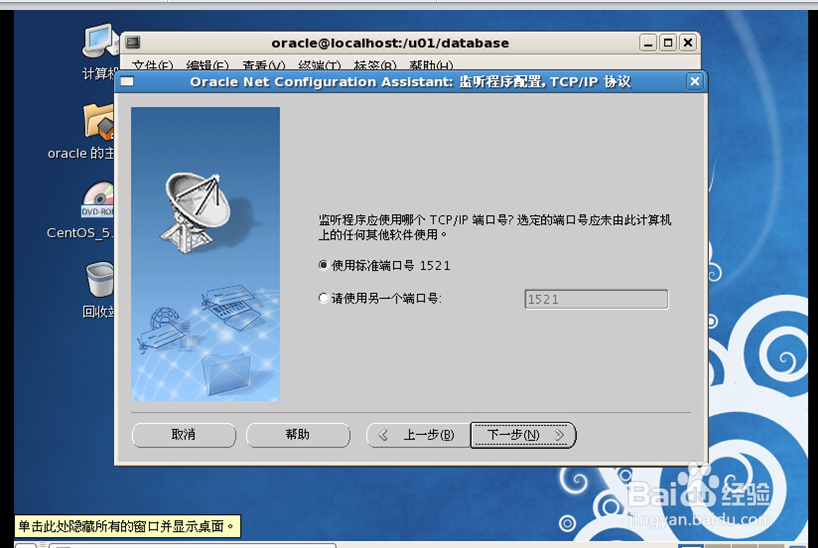
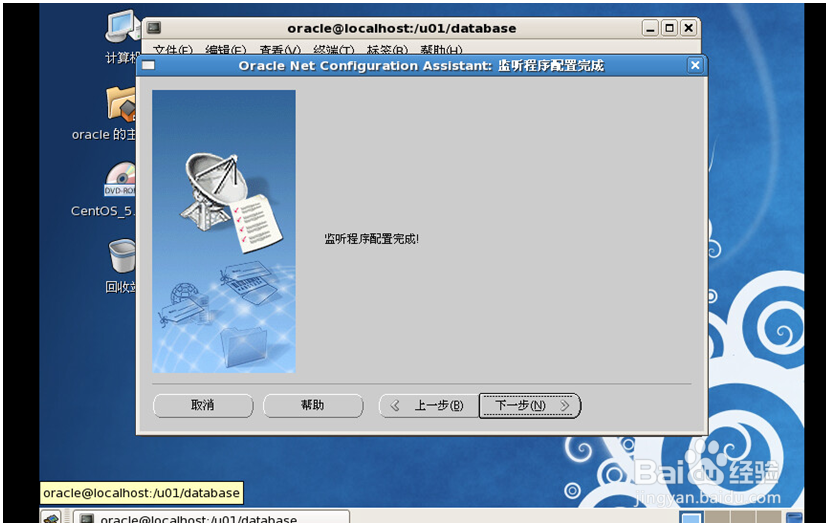
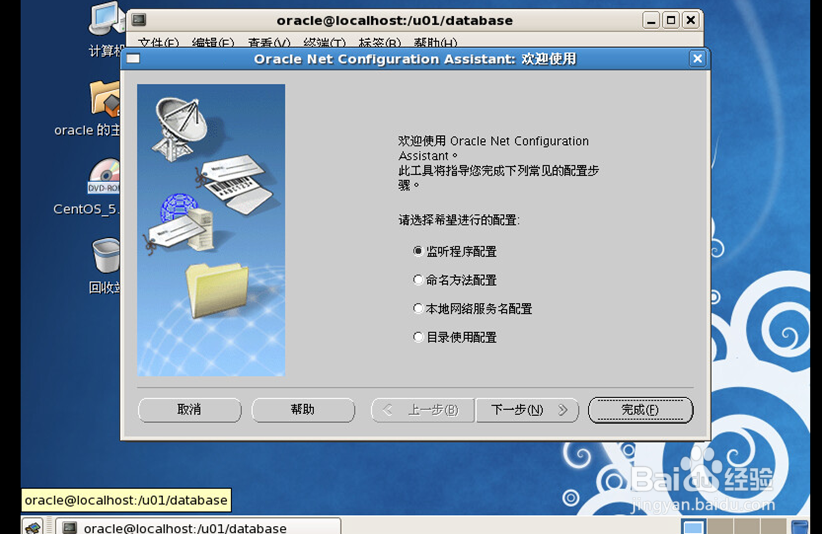
11、上面只是安装了软件,数据库没有创建,还有配置监听器 Listener
命令 netca
一直默认下一步,最后finish
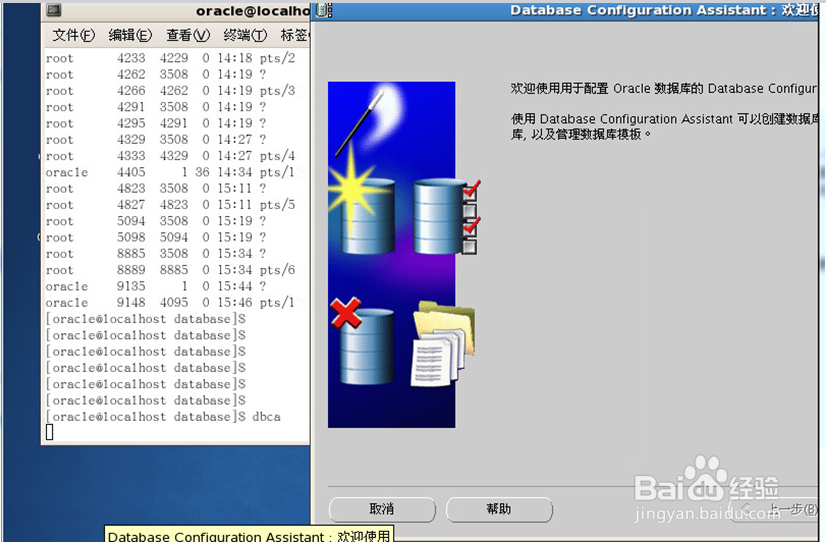
12、Ps -ef

13、Dbca
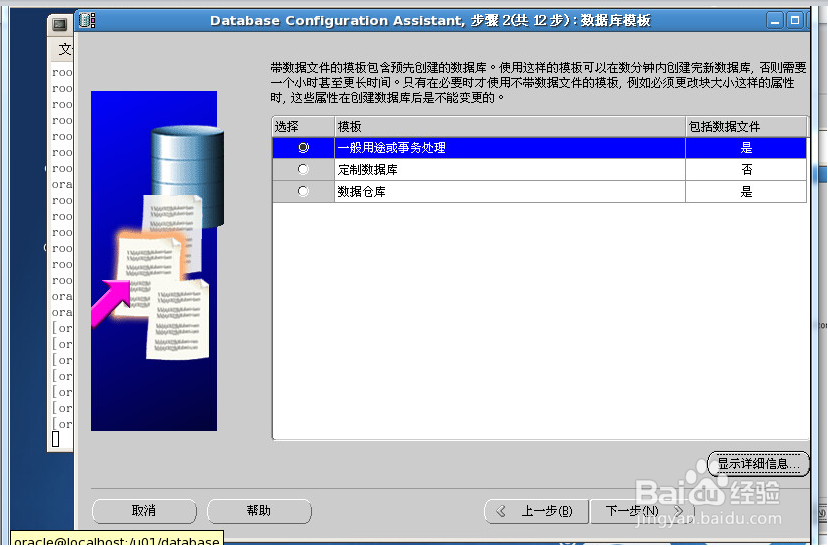
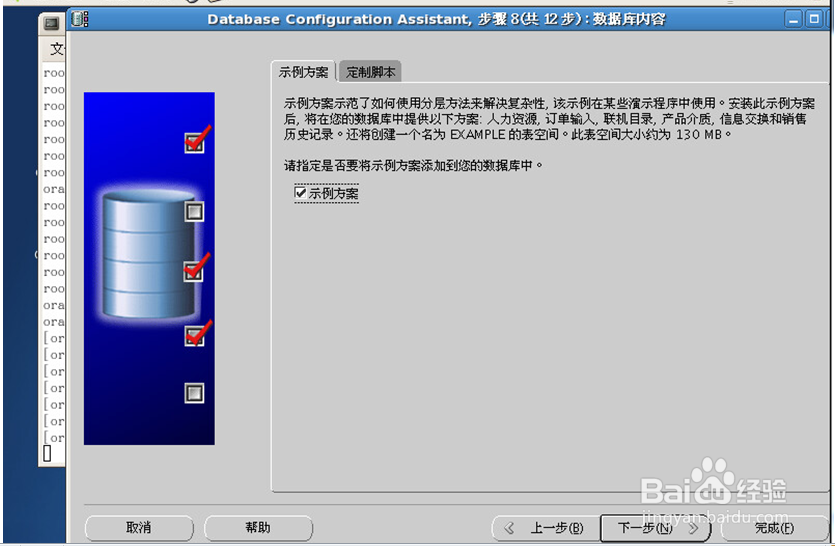
一直next, Global Database Name和SID都是输入orcl
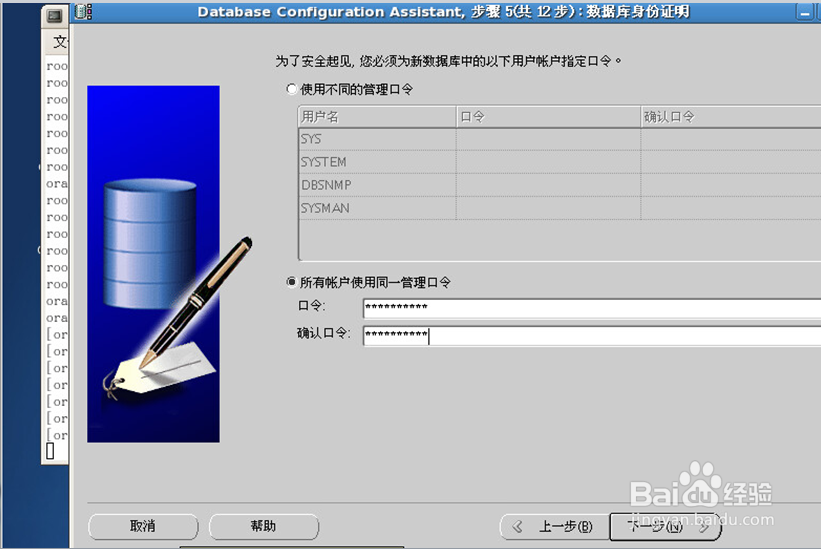
选择 User th same ….. all accounts
密码 123456
选择Sample Schemas
Memory 内存分配,默认就可以了
Character Sets选择Use Unicode(AL32UTF8)
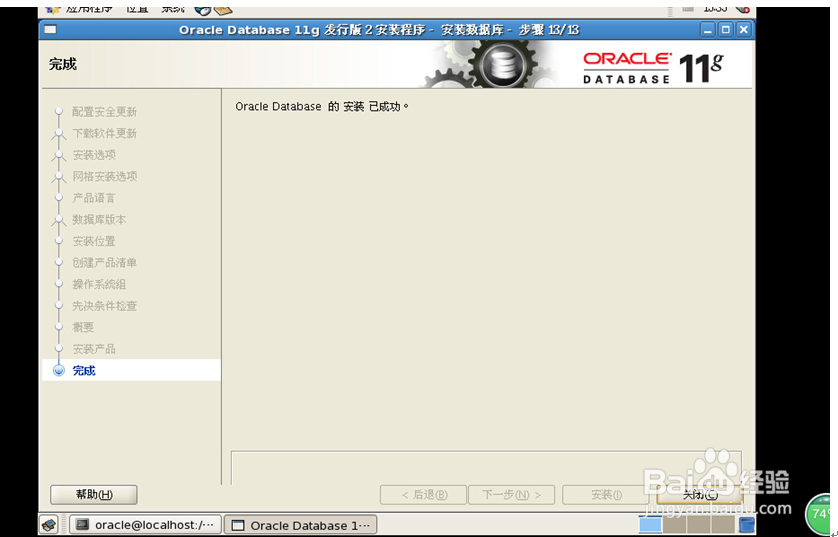
然后一直Next,到最后Finish
弹出一个Confirmation,点击OK就可以了,然后自动进行安装
安装到目录 /u01/oradata/orcl
/u01/等等。。。会发现多了很多文件


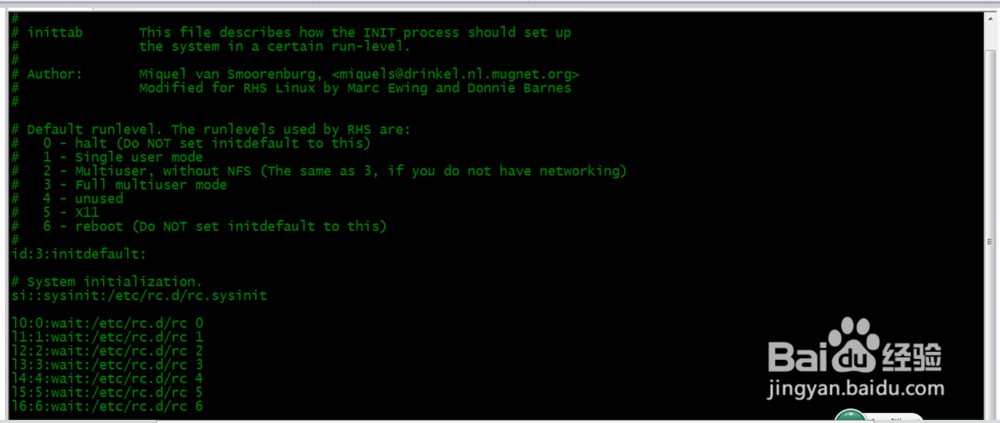
14、然后可以修改 vi /etc/inittab 让centos 启动的时候 不进入图形界面 直接进入字符界面
id:5:initdefault: 修改成 id:3:initdefault:
保存退出,然后重启系统。
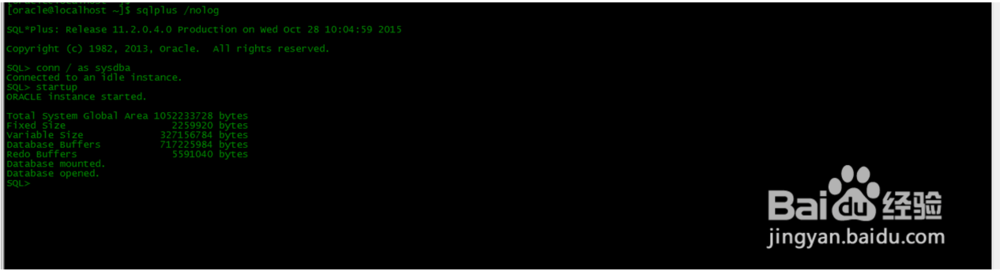
用oracle 用户 远程登录,然后
$sqlplus /nolog
SQL> conn / as sysdba
出现错误
Connected to an idle instance.
SQL>startup
SQL> startup
ORACLE instance started.
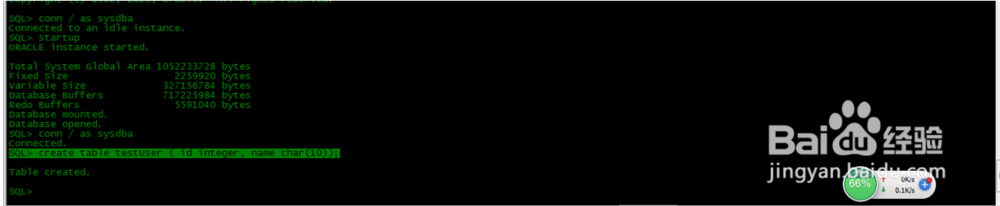
15、SQL> conn / as sysdba
SQL> create table testUser ( id integer, name char(10));
16、解决sqlplus乱码问题
[oracle@localhost ~]$ ls -1a
[oracle@localhost ~]# vim .bash_profile
增加一条
export NLS_LANG="AMERICAN_AMERICA.AL32UTF8"