Unity Rigidbody使用 之 获取运动物体的速率
1、Rigidbody:
Control of an object's position through physics simulation.
Adding a Rigidbody component to an object will put its motion under the control of Unity's physics engine. Even without adding any code, a Rigidbody object will be pulled downward by gravity and will react to collisions with incoming objects if the right Collider component is also present.The Rigidbody also has a scripting API that lets you apply forces to the object and control it in a physically realistic way. For example, a car's behaviour can be specified in terms of the forces applied by the wheels. Given this information, the physics engine can handle most other aspects of the car's motion, so it will accelerate realistically and respond correctly to collisions.
2、Rigidbody.velocity:
1)功能描述
public Vector3 velocity;
The velocity vector of the rigidbody.
In most cases you should not modify the velocity directly, as this can result in unrealistic behaviour. Don't set the velocity of an object every physics step, this will lead to unrealistic physics simulation. A typical example where you would change the velocity is when jumping in a first person shooter, because you want an immediate change in velocity.
using UnityEngine;using System.Collections;2)使用案例public class ExampleClass : MonoBehaviour {
public Rigidbody rb;
void Start() {
rb = GetComponent<Rigidbody>();
}
void FixedUpdate() {
if (Input.GetButtonDown("Jump"))
rb.velocity = new Vector3(0, 10, 0);
}
}
3、Vector3.magnitude:
public float magnitude;
Returns the length of this vector (Read Only).
The length of the vector is square root of (x*x+y*y+z*z).If you only need to compare magnitudes of some vectors, you can compare squared magnitudes of them using sqrMagnitude(computing squared magnitudes is faster).
4、方法提示:
1)获取物体Rigidbody组件
2)Rigidbody.AddForce给物体施加力
3)求得物体的Rigidbody.velocity.magnitude,并打印
1、打开Unity,新建一个空工程,具体如下图

2、在场景中,新建“Plane”和“Cube”,并调整他们你的布局,具体如下图

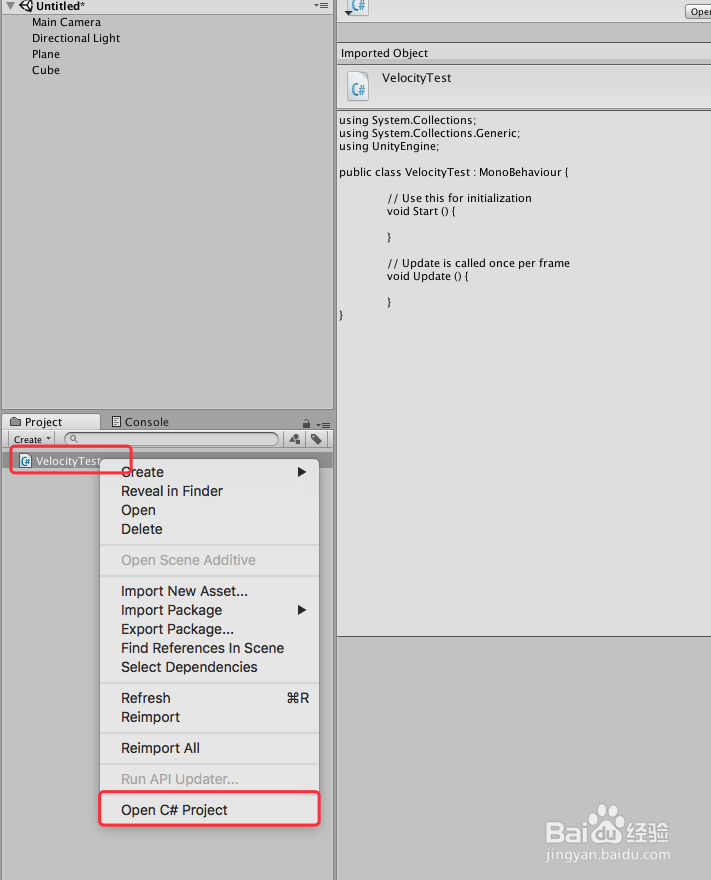
3、在工程中新建一个脚本“VelocityTest”,双击脚本或者右键“Open C# Project”打开脚本,具体如下图
4、在打开的脚本“VelocityTest”上编辑代码,首先获取物体“Rigidbody”组件,然后在Update函数中按下“F”键给物体施力,最后求得物体的“Rigidbody.velocity.magnitude”,并打印,具体的代码和代码说明如下图

5、“VelocityTest”脚本的具体内容如下:
using UnityEngine;
public class VelocityTest : MonoBehaviour {
private Rigidbody rigidbody;
public float smooth = 50.0f;
// Use this for initialization
void Start () {
rigidbody = this.transform.GetComponent <Rigidbody> ();
}
// Update is called once per frame
void Update () {
if (Input.GetKeyDown (KeyCode.F)) {
rigidbody.AddForce (Vector3.right * smooth);
}
float speed = rigidbody.velocity.magnitude;
print ("speed :"+speed);
}
}
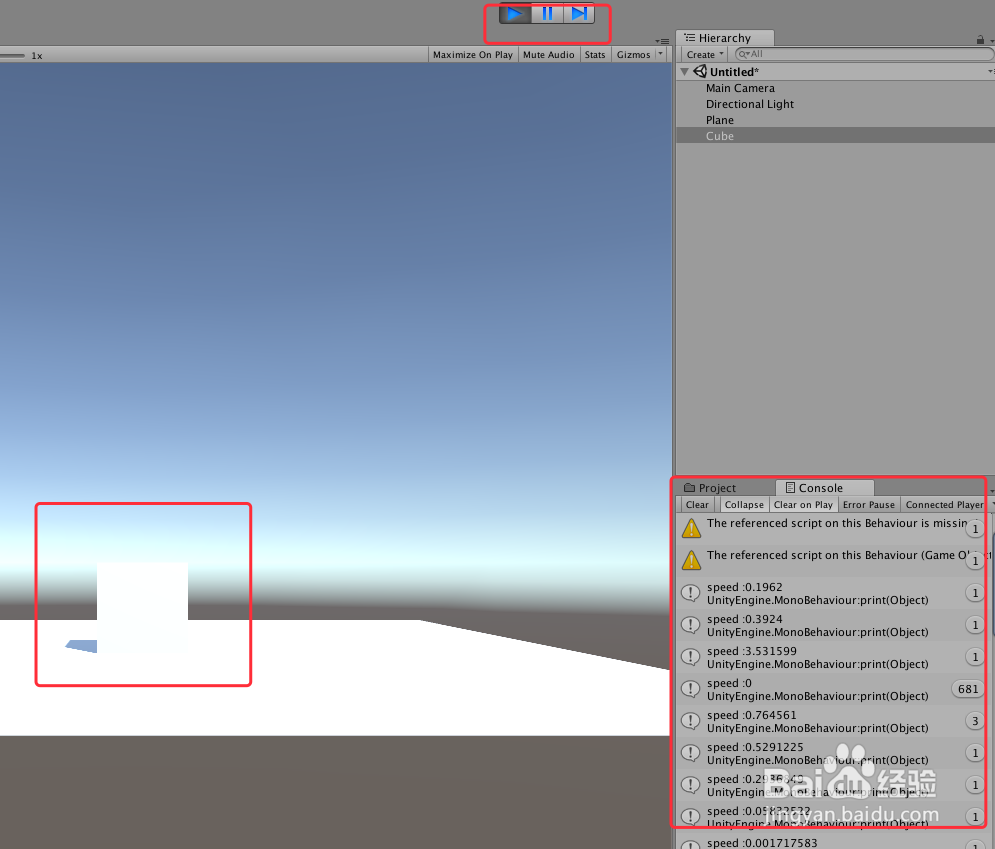
6、脚本编译正确,回到Unity,把脚本“VelocityTest”赋给“Cube”,并给“Cube”添加“Rigidbody”组件,具体如下图

7、运行场景,按下“F”键,即可看到物体运动,控制台console打印对应速率数据,具体如下图
8、到此,《Unity Rigidbody使用 之 获取运动物体的速率》讲解结束,谢谢