SpringBoot如何进行项目打包部署
1、SpringBoot作为微架构实现主要技术,其发布项目的方式极为简单,只需要你在你的项目中配置好插件,一级打包就可以执行了,并且这个执行不需要特别负责的配置。
【SpringBoot项目】修改pom.xml配置文件,追加新的插件:
<project xmlns="http://maven.apache.org/POM/4.0.0" xmlns:xsi="http://www.w3.org/2001/XMLSchema-instance"
xsi:schemaLocation="http://maven.apache.org/POM/4.0.0 http://maven.apache.org/xsd/maven-4.0.0.xsd">
<modelVersion>4.0.0</modelVersion>
<modules>
<module>springbootbase</module>
</modules>
<properties>
<project.build.sourceEncoding>UTF-8</project.build.sourceEncoding>
<jdk.version>1.8</jdk.version>
</properties>
<groupId>com.gwolf</groupId>
<artifactId>SpringBoot</artifactId>
<version>1.0-SNAPSHOT</version>
<packaging>pom</packaging>
<name>SpringBoot</name>
<url>http://maven.apache.org</url>
<dependencyManagement>
<dependencies>
<dependency>
<groupId>org.springframework.boot</groupId>
<artifactId>spring-boot-dependencies</artifactId>
<version>1.5.4.RELEASE</version>
<type>pom</type>
<scope>import</scope>
</dependency>
</dependencies>
</dependencyManagement>
<build>
<finalName>SpringBoot</finalName>
<plugins>
<plugin>
<groupId>org.apache.maven.plugins</groupId>
<artifactId>maven-compiler-plugin</artifactId>
<configuration>
<source>${jdk.version}</source>
<target>${jdk.version}</target>
<encoding>${project.build.sourceEncoding}</encoding>
</configuration>
</plugin>
<!--该插件的主要功能是进行项目的打包发布处理-->
<plugin>
<groupId>org.springframework.boot</groupId>
<artifactId>spring-boot-maven-plugin</artifactId>
<version>1.5.4.RELEASE</version>
<configuration> <!--设置程序执行的主类-->
<mainClass>com.gwolf.StartSpringBootMain</mainClass>
</configuration>
<executions>
<execution>
<goals>
<goal>repackage</goal>
</goals>
</execution>
</executions>
</plugin>
</plugins>
</build>
</project>

2、由于增加了新的插件,所以对于整个程序一定要进行整体的项目更新。
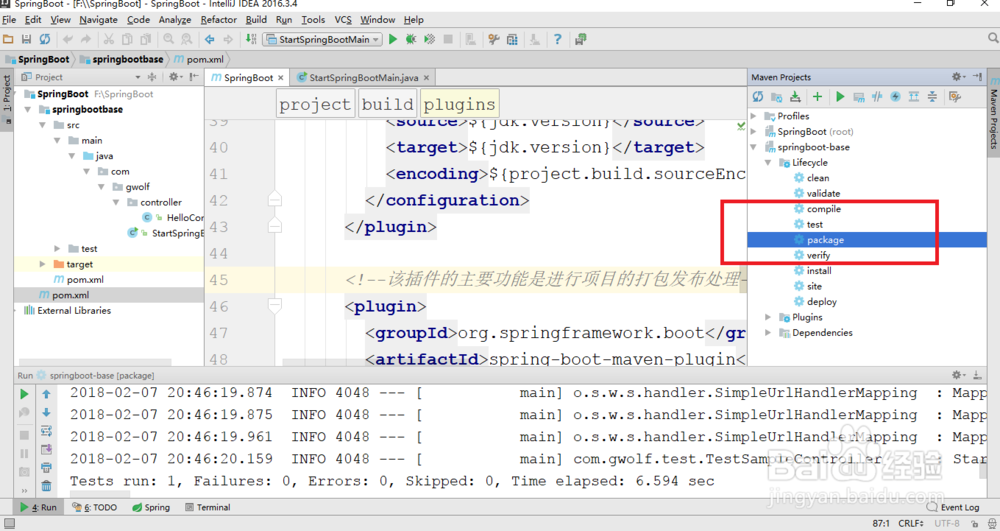
【springbootbase模块】将当前项目模块进行打包处理:clean package。
在右边点击package。

3、此时将形成“SpringBoot.jar”程序文件,并且这个文件里面包含有全部的依赖支持库文件。

4、将“SpringBoot.jar”文件随意拷贝到一个路径之中,例如:D盘,而后进入到命令行方式:java -jar SpringBoot.jar

5、执行完成之后,我们的服务就跑起来了,可以通过浏览器正常访问:


6、若果此时想再Linux下执行,只需要将这个*.jar文件直接拷贝到Linux下即可。
