使用eclipse创建springboot项目
1、在线安装
1.1 打开eclipse--》help--》eclipse Marketplace...
打开插件安装界面
1.2 在界面选择Popular--》点击安装
1.3 安装过程如下所示:
1.4 也可以在Search中搜索“Spring Tool Suite”找到需要安装的插件
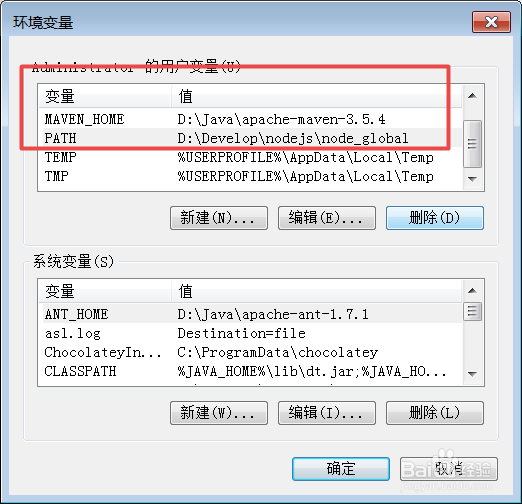
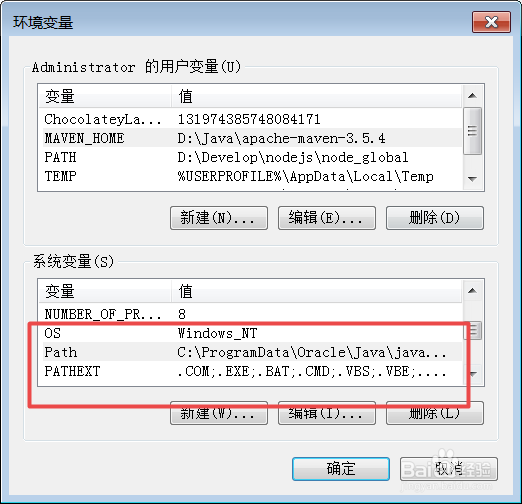
1、第一步:配置maven环境变量。
1、 配置MAVEN_HOME:注意maven_home的变量值是你maven的压缩包的解压地址:如我的是(D:\Java\apache-maven-3.5.4)
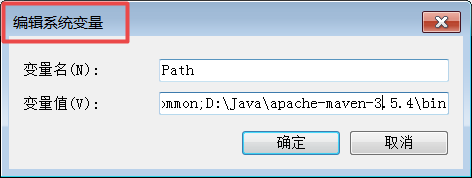
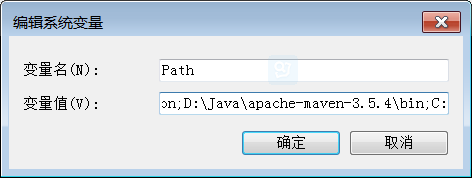
2、修改系统变量 PATH 添加:D:\Java\apache-maven-3.5.4\bin;
2、第二步:环境配置测试
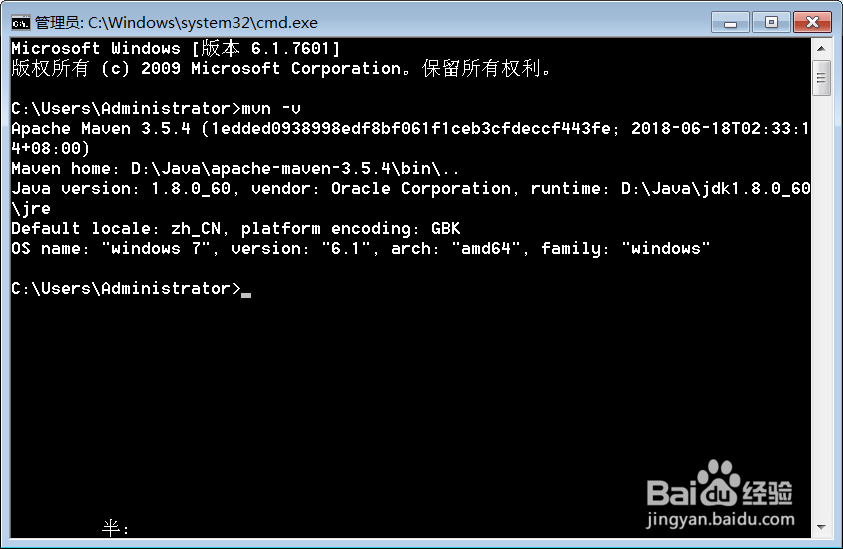
1、测试maven 打开运行命令(快捷键:window+R) cmd进入控制台输入:mvn -v
2、控制台输出maven的信息则所示maven配置成功。
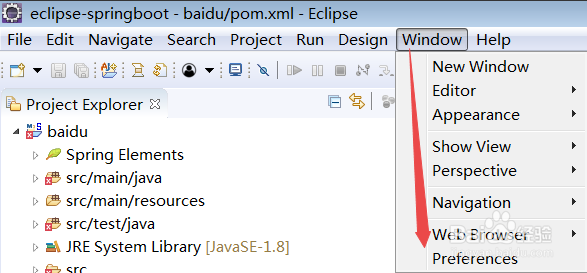
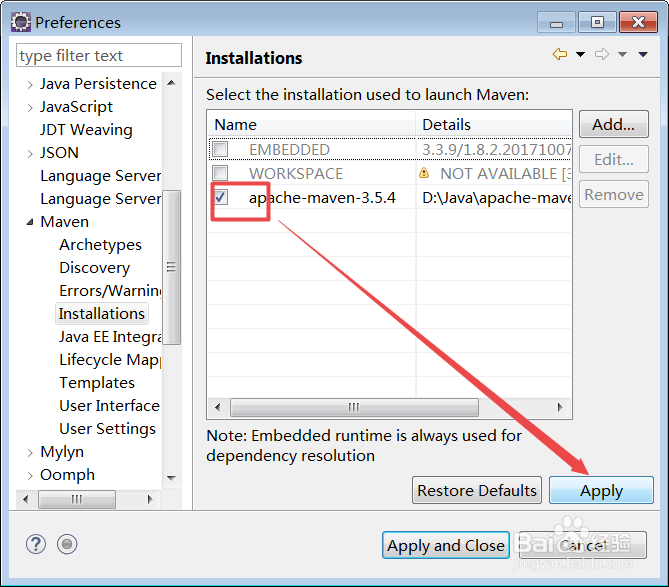
3、第三步:eclipse配置maven。
1、开发设置窗口 window--》preference
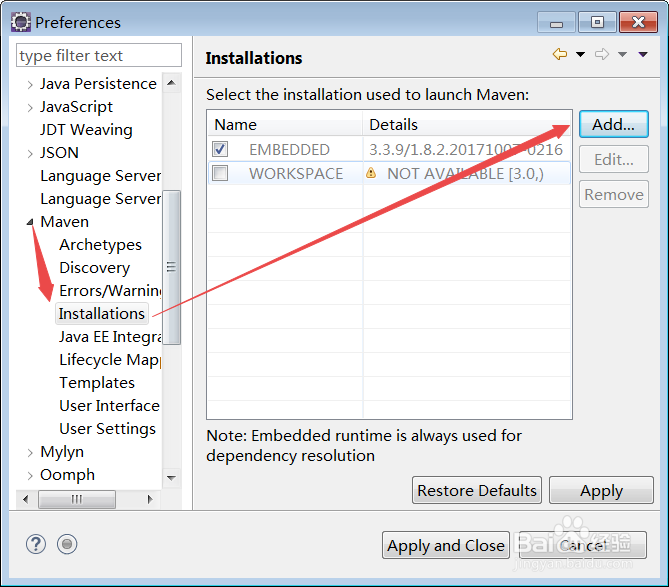
2、打开maven设置窗口 选择maven--》installation
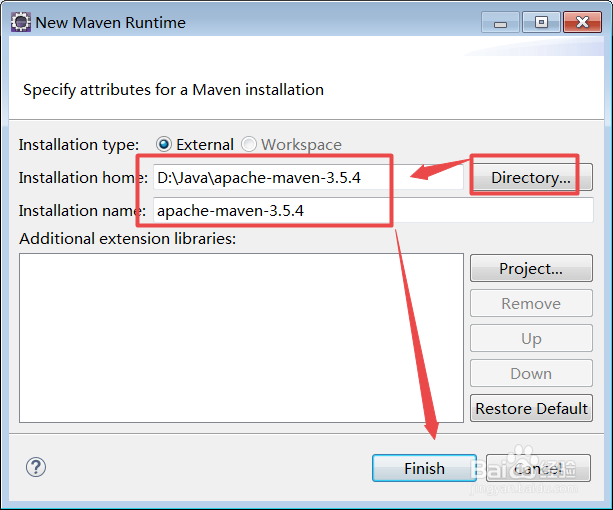
3、添加需要的maven add--》directory
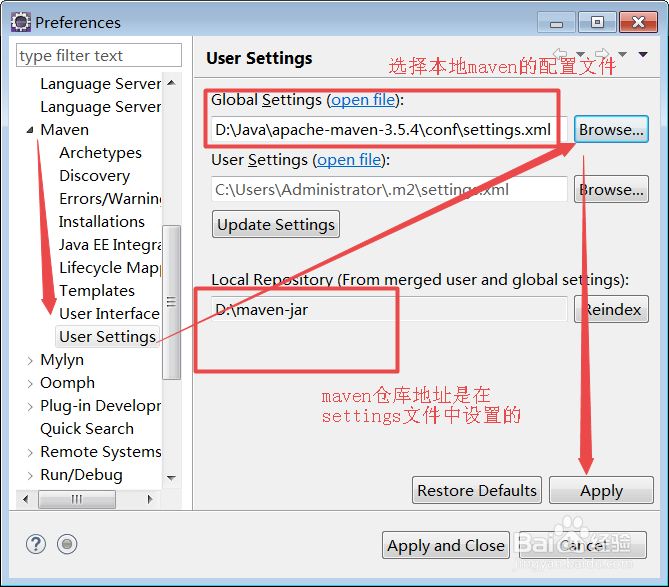
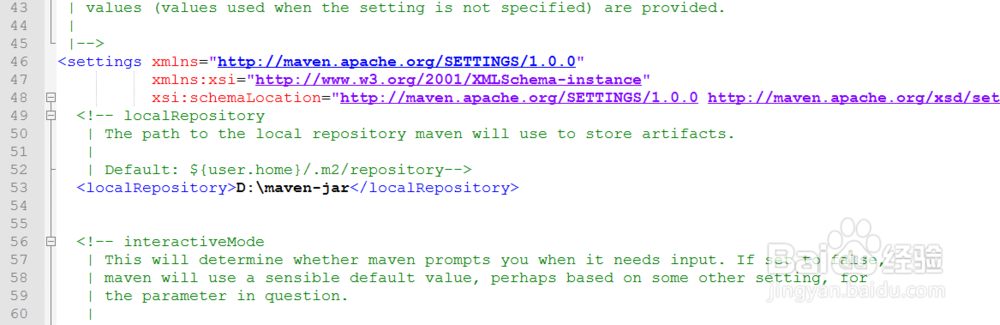
4、引入本地maven的配置文件settings.xml并设置自己的仓库
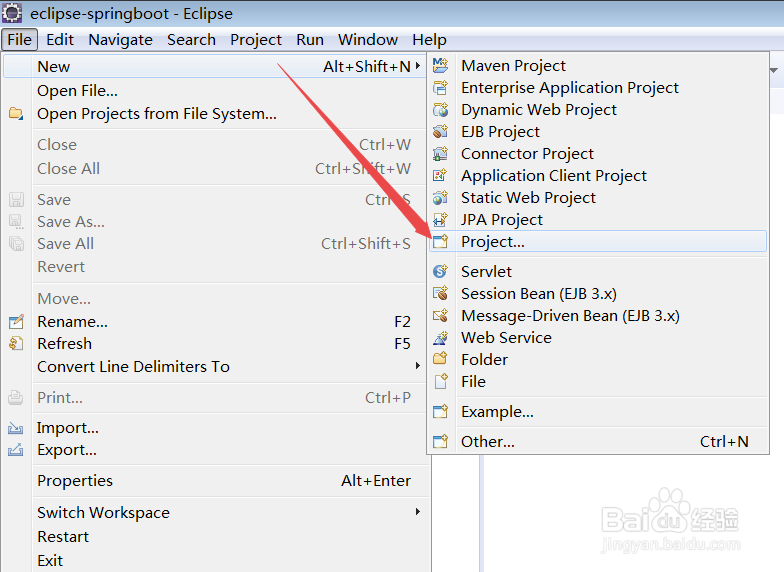
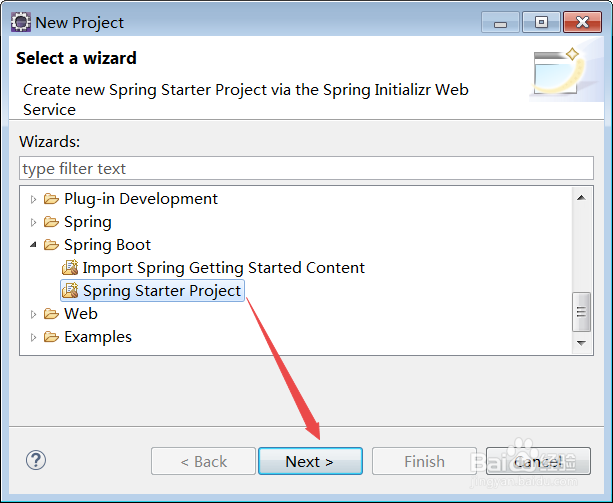
1、第一步: 打开项目创建窗口
1、打开eclipse file--》project...打开项目类型选择窗口
2、选择创建项目的类型spring boot---》Spring Starter Project 打开项目创建窗口。
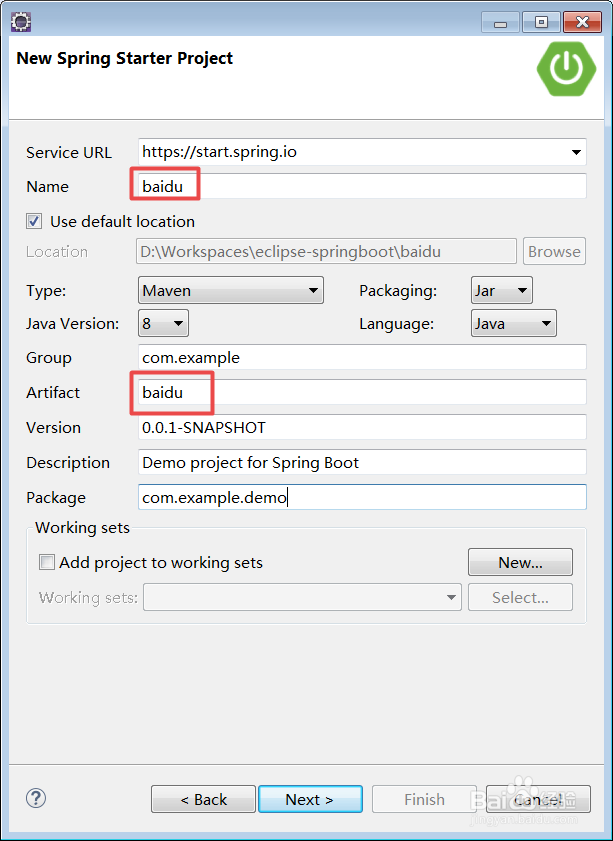
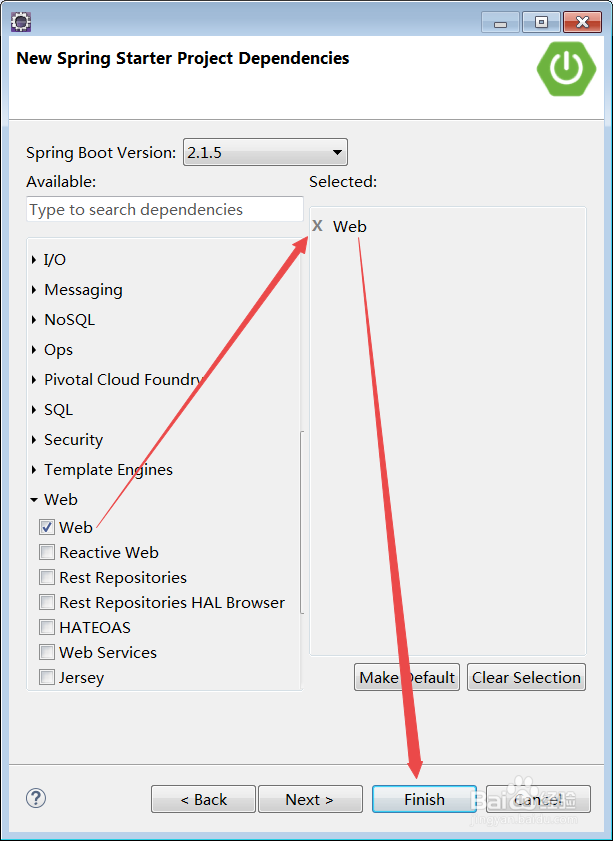
2、第二步:创建项目
输入项目名称,选择项目依赖(一般都需要web),其它依赖根据自己需求选择。

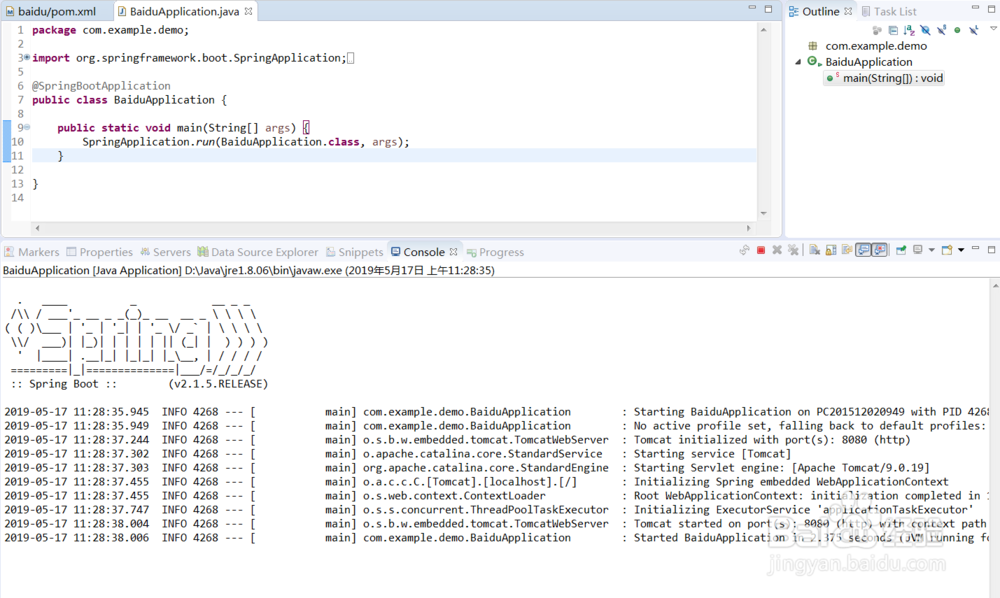
3、第三步:项目结构。
1、结果如下所示
2、启动正常

声明:本网站引用、摘录或转载内容仅供网站访问者交流或参考,不代表本站立场,如存在版权或非法内容,请联系站长删除,联系邮箱:site.kefu@qq.com。
阅读量:157
阅读量:85
阅读量:92
阅读量:50
阅读量:109