CentOS 7.1配置dnsmasq
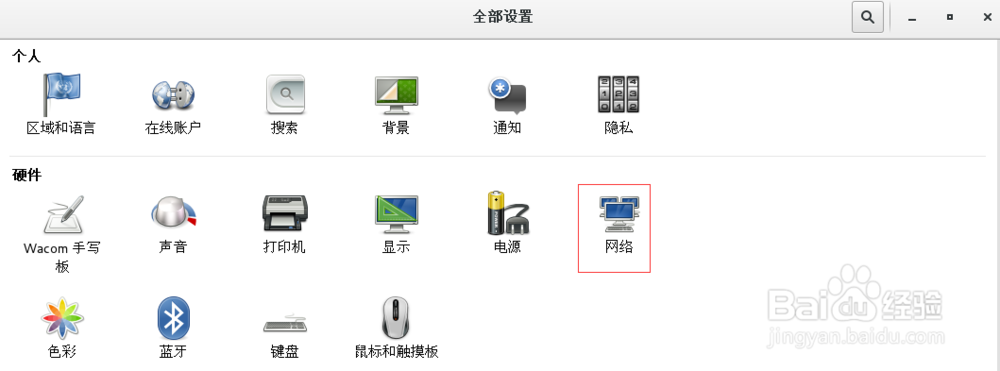
1、Cent OS 7.1上面版本网络配置,请按以下图示进行操作(如果网络已经配置好,可以直接进入第二步):


2、防火墙配置
使用如下命令:
systemctl stop firewalld.service #停止firewall
systemctl disable firewalld.service #禁止firewall开机启动
也可以不用关闭防火墙,单独打开53端口
执行效果如图所示:

3、设置本机localhost dns地址,由于我的centos系统本地地址为:192.168.0.149,我的设置如下图所示:
打开/etc/hosts文件,修改为如下内容:

4、使用yum安装dnsmasq
执行如下命令组:
sudo yum install dnsmasq
执行结果:


5、配置dnsmasq.conf,使用编辑器打开/etc/dnsmasq.conf,进行编辑,
编辑内容如下图所示:

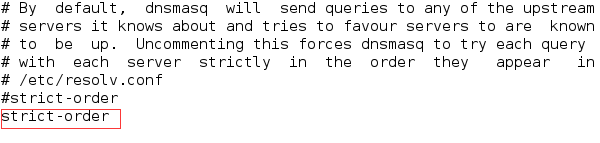


6、编辑/etc/resolv.config内容中新加如下部分:

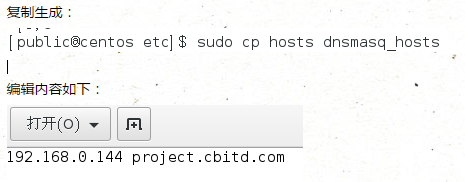
7、增加dnsmasq.hosts文件
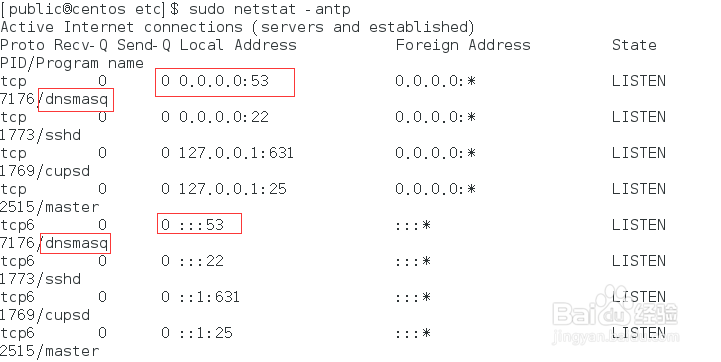
8、使用此命令检查系统没有占用53端口:
netstat -antp
如果有就kill掉
执行效果如下:

9、启动服务
service dnsmasq start
10、检查服务是否正常运行
执行命令:
netstat -antp

声明:本网站引用、摘录或转载内容仅供网站访问者交流或参考,不代表本站立场,如存在版权或非法内容,请联系站长删除,联系邮箱:site.kefu@qq.com。
阅读量:164
阅读量:33
阅读量:111
阅读量:183
阅读量:59