图片根据鼠标轨迹移动效果
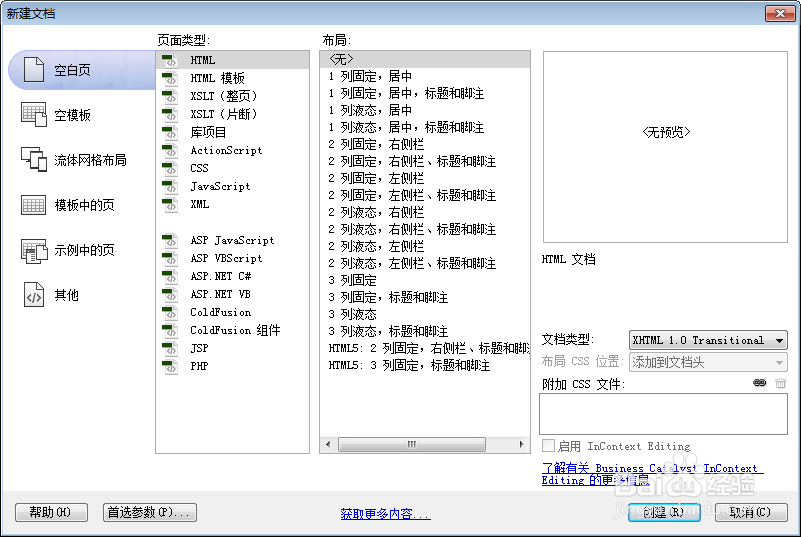
1、新建html文档。
2、准备好需要用到的图标。


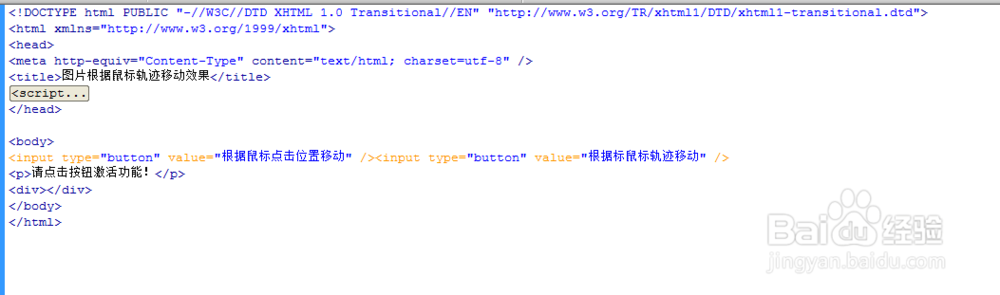
3、书写hmtl代码。
<input type="button" value="根据鼠标点击位置移动" /><input type="button" value="根据标鼠标轨迹移动" />
请点击按钮激活功能!
<div></div>

4、书写css代码。
body, div { margin: 0; padding: 0; }
div { position: absolute; width: 66px; height: 45px; background: url(../images/pic.gif) no-repeat; top: 100px; left: 50px; }
p, input { margin: 10px; }

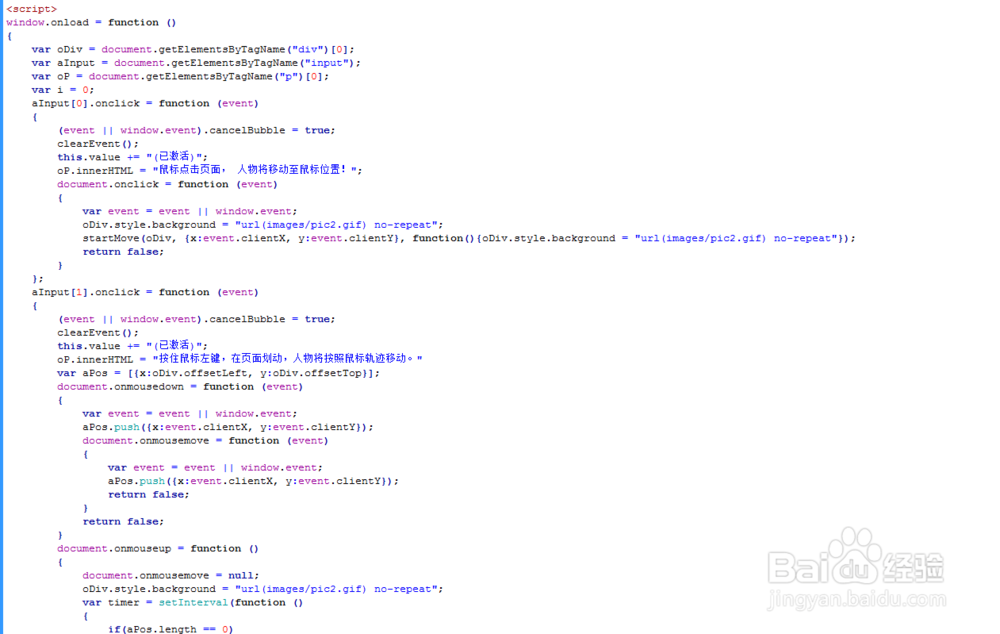
5、书写并添加js代码。
<script>
window.onload = function ()
{
var oDiv = document.getElementsByTagName("div")[0];
var aInput = document.getElementsByTagName("input");
var oP = document.getElementsByTagName("p")[0];
var i = 0;
aInput[0].onclick = function (event)
{
(event || window.event).cancelBubble = true;
clearEvent();
this.value += "(已激活)";
oP.innerHTML = "鼠标点击页面, 人物将移动至鼠标位置!";
document.onclick = function (event)
{
var event = event || window.event;
oDiv.style.background = "url(images/pic2.gif) no-repeat";
startMove(oDiv, {x:event.clientX, y:event.clientY}, function(){oDiv.style.background = "url(images/pic2.gif) no-repeat"});
return false;
}
};
aInput[1].onclick = function (event)
{
(event || window.event).cancelBubble = true;
clearEvent();
this.value += "(已激活)";
oP.innerHTML = "按住鼠标左键,在页面划动,人物将按照鼠标轨迹移动。"
var aPos = [{x:oDiv.offsetLeft, y:oDiv.offsetTop}];
document.onmousedown = function (event)
{
var event = event || window.event;
aPos.push({x:event.clientX, y:event.clientY});
document.onmousemove = function (event)
{
var event = event || window.event;
aPos.push({x:event.clientX, y:event.clientY});
return false;
}
return false;
}
document.onmouseup = function ()
{
document.onmousemove = null;
oDiv.style.background = "url(images/pic2.gif) no-repeat";
var timer = setInterval(function ()
{
if(aPos.length == 0)
{
clearInterval(timer);
oDiv.style.background = "url(images/pic.gif) no-repeat";
return;
};
oDiv.style.left = aPos[0].x + "px";
oDiv.style.top = aPos[0].y + "px";
aPos.shift();
}, 30);
};
}
function clearEvent()
{
document.onclick = null;
document.onmousedown = null;
document.onmousemove = null;
document.onmouseup = null;
for (i = 0; i < aInput.length; i++)
{
aInput[i].value = aInput[i].value.replace("(已激活)", "");
aInput[i].onmousedown = aInput[i].onmouseup = function (event)
{
(event || window.event).cancelBubble = true;
};
}
}
};
function startMove(obj, oTarget, fnEnd)
{
clearInterval(obj.timer);
obj.timer = setInterval(function ()
{
doMove(obj, oTarget, fnEnd)
}, 30)
}
function doMove(obj, oTarget, fnEnd)
{
var iX = (oTarget.x - obj.offsetLeft) / 5;
var iY = (oTarget.y - obj.offsetTop) / 5;
iX = iX > 0 ? Math.ceil(iX) : Math.floor(iX);
iY = iY > 0 ? Math.ceil(iY) : Math.floor(iY);
if (oTarget.x == obj.offsetLeft && oTarget.y == obj.offsetTop)
{
clearInterval(obj.timer);
fnEnd && fnEnd();
}
else
{
obj.style.left = obj.offsetLeft + iX + "px";
obj.style.top = obj.offsetTop + iY + "px";
}
}
</script>
6、代码整体结构。
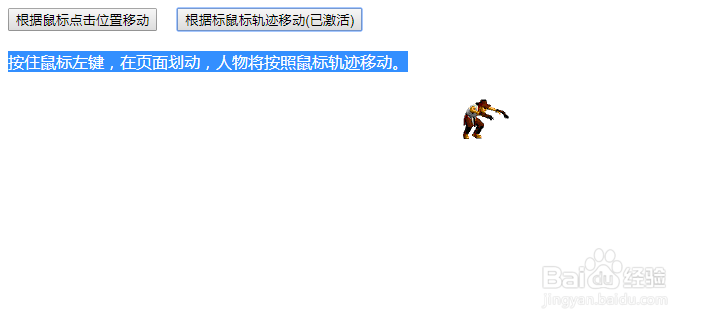
7、查看效果。