三层交换机物理接口做路由案例(思科系列)
1、三层交换机与二层交换机(桥梁的作用)连接,二层交换机下面连接PC,拓扑图如下。注:端口一定要连接正确,否则会不通,(怎么查看端口前面讲过)。

2、配置PC0 IP地址,子网掩码,网关

3、配置PC1 IP地址,子网掩码,网关

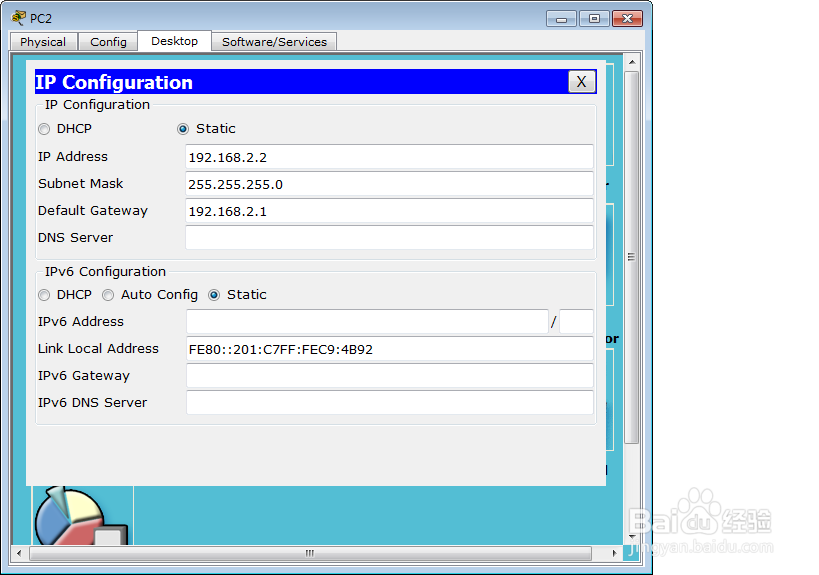
4、配置PC2 IP地址,子网掩码,网关
5、配置PC3 IP地址,子网掩码,网关

1、Switch>enable
Switch#conf
Configuring from terminal, memory, or network [terminal]?
Enter configuration commands, one per line. End with CNTL/Z.
Switch(config)#interface fastethernet0/1
Switch(config-if)#no switchport
Switch(config-if)#
%LINEPROTO-5-UPDOWN: Line protocol on Interface FastEthernet0/1, changed state to down
%LINEPROTO-5-UPDOWN: Line protocol on Interface FastEthernet0/1, changed state to up
Switch(config-if)#ip add 192.168.1.1 255.255.255.0
Switch(config-if)#no shutdown
Switch(config-if)#exit
Switch(config)#interface fastethernet0/2
Switch(config-if)#no switchport
Switch(config-if)#
%LINEPROTO-5-UPDOWN: Line protocol on Interface FastEthernet0/2, changed state to down
%LINEPROTO-5-UPDOWN: Line protocol on Interface FastEthernet0/2, changed state to up
Switch(config-if)#ip add 192.168.2.1 255.255.255.0
Switch(config-if)#no shutdown
Switch(config-if)#exit
Switch(config)#ip routing
Switch(config)#exit
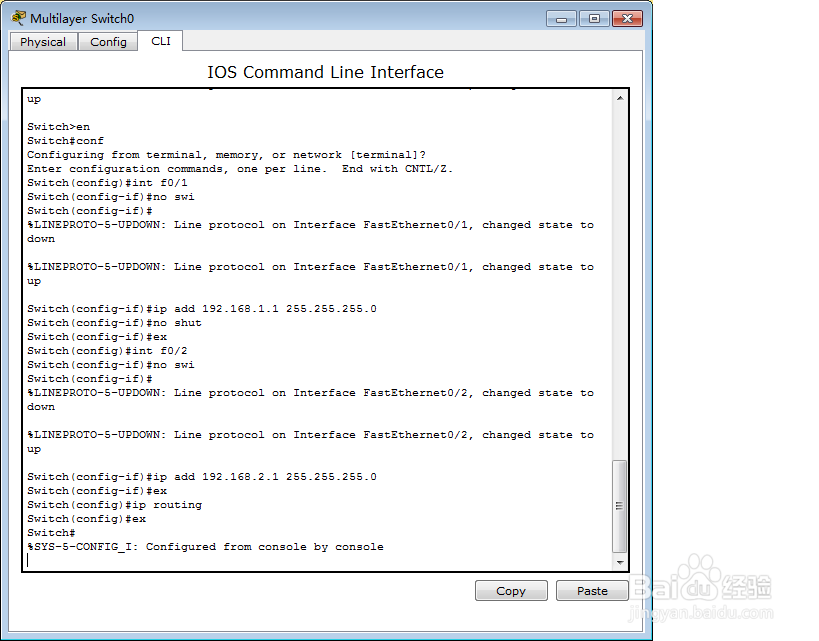
2、注意,在配置三层交换机时,一定要输入ip routing才能开启路由功能。
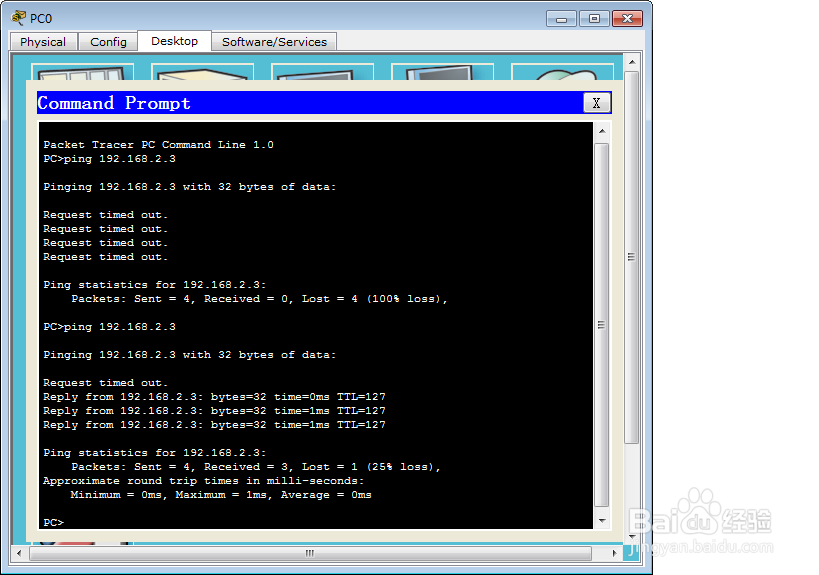
前后对比。