使用Scrapy爬虫简书的内容保存到本地
1、使用scrapy startproject zhifuSpider创建Scrapy框架工程:
hxb@lion:~/PycharmProjects$ scrapy startproject zhifuSpider
New Scrapy project 'zhifuSpider', using template directory '/home/hxb/.local/lib/python3.6/site-packages/scrapy/templates/project', creat////////ed in: /home/hxb/PycharmProjects/zhifuSpiderYou can start your first spider with: cd zhifuSpider scrapy genspider example example.com

2、使用scrapy generate 产生spider类:
hxb@lion:~/PycharmProjects$ cd zhifuSpider
hxb@lion:~/PycharmProjects/zhifuSpider$ scrapy genspider zhihu https://zhuanlan.zhihu.com/easypan
Created spider 'zhihu' using template 'basic'

1、在PyCharm中打开zhihuSpider工程:File-》Open
导入工程后,系统默认使用了Python2.7, 我们需要在setting中修改该工程的python环境为Python 3.

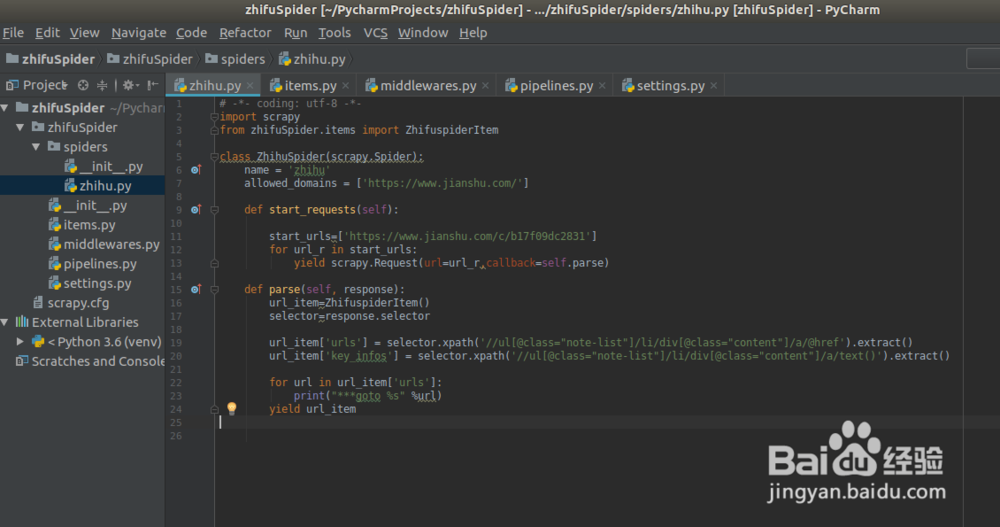
2、编写爬虫主类zhihu.py
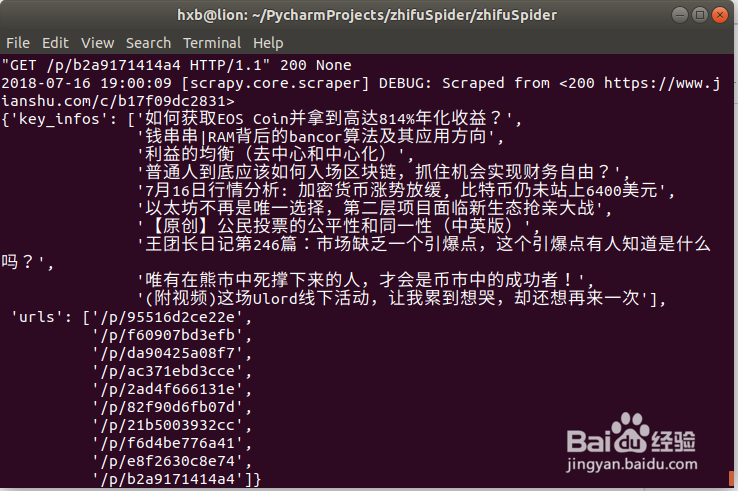
获取主页中的所有文章列表信息,包括文章标题和文章链接,xpath信息如下:
url_item['urls'] = selector.xpath('//ul[@class="note-list"]/li/div[@class="content"]/a/@href').extract()
url_item['key_infos'] = selector.xpath('//ul[@class="note-list"]/li/div[@class="content"]/a/text()').extract()
3、编写爬虫的内容后处理pipelines.py:
这里我将每篇文章的标题和内容保存,以文章的标题作为文件名(html)保存到本地文件系统中

4、爬虫配置文件settings.py: 需要配置爬虫的pipeline

1、运行scrapy工程:使用命令scrapy crawl zhihu
hxb@lion:~/PycharmProjects/zhifuSpider/zhifuSpider$ scrapy crawl zhihu
2、在运行爬虫后,在后台日志中可以发现403错误,文章的内容也没有正确保存
403 erro , requests need add user agnet in the header
2018-07-16 18:55:34 [scrapy.core.engine] DEBUG: Crawled (403) <GET https://www.jianshu.com/c/b17f09dc2831> (referer: None)2018-07-16 18:55:34 [scrapy.spidermiddlewares.httperror] INFO: Ignoring response <403 https://www.jianshu.com/c/b17f09dc2831>: HTTP status code is not handled or not allowed

3、解决403问题的方法:
1. 需要在 settings.py文件中,增加user_agent选项
2. 重新运行爬虫

4、检查爬虫输出是否正确
1. 爬虫日志没有出现日志
2. 爬虫的结果也正确保存到了本地文件