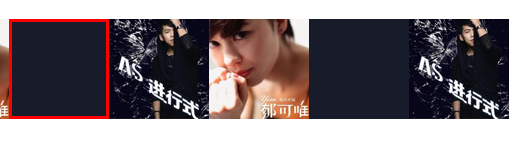
鼠标经过图片显示边框
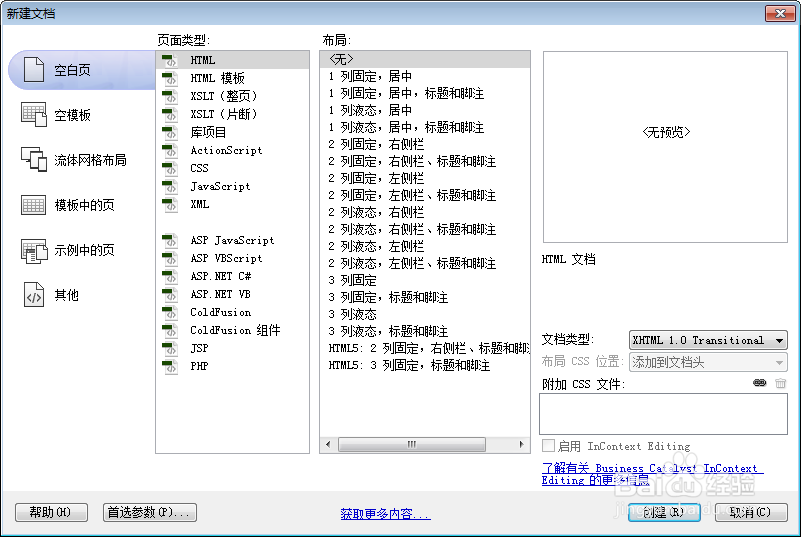
1、新建html文档。
2、准备好需要用到的图标。

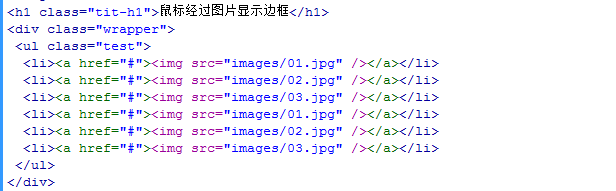
3、书写hmtl代码。
<h1 class="tit-h1">鼠标经过图片显示边框</h1>
<div class="wrapper">
<ul class="test">
<li><a href="#"><img src="images/01.jpg" /></a></li>
<li><a href="#"><img src="images/02.jpg" /></a></li>
<li><a href="#"><img src="images/03.jpg" /></a></li>
<li><a href="#"><img src="images/01.jpg" /></a></li>
<li><a href="#"><img src="images/02.jpg" /></a></li>
<li><a href="#"><img src="images/03.jpg" /></a></li>
</ul>
</div>
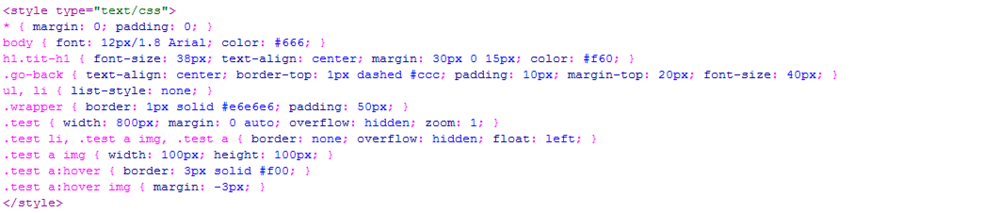
4、书写css代码。
<style type="text/css">
* { margin: 0; padding: 0; }
body { font: 12px/1.8 Arial; color: #666; }
h1.tit-h1 { font-size: 38px; text-align: center; margin: 30px 0 15px; color: #f60; }
.go-back { text-align: center; border-top: 1px dashed #ccc; padding: 10px; margin-top: 20px; font-size: 40px; }
ul, li { list-style: none; }
.wrapper { border: 1px solid #e6e6e6; padding: 50px; }
.test { width: 800px; margin: 0 auto; overflow: hidden; zoom: 1; }
.test li, .test a img, .test a { border: none; overflow: hidden; float: left; }
.test a img { width: 100px; height: 100px; }
.test a:hover { border: 3px solid #f00; }
.test a:hover img { margin: -3px; }
</style>
5、代码整体结构。

6、查看效果。