nginx服务器如何配置wordpress博客伪静态
1、若nginx服务器wordpress博客安装在主域名
使用ftp软件登录服务器。
依次找到并打开服务器/usr/local/nginx/conf/rewrite
新建一个xx.conf文件,例如本教程新建51zc.conf文件
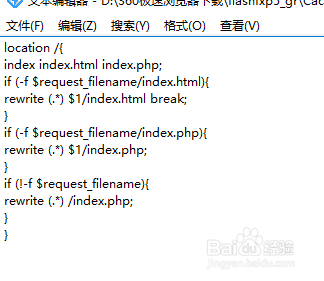
然后打开51zc.conf文件打开加上以下的代码。
location /{index index.html
index.php;
if (-f $request_filename/index.html)
{rewrite (.*) $1/index.html break;}
if (-f $request_filename/index.php)
{rewrite (.*) $1/index.php;}
if (!-f $request_filename)
{rewrite (.*) /index.php;}
}

2、nginx服务器wordpress博客安装在二级目录操作方法
类似上面的方法;将二级目录替换成你的英文二级文件名字,例如本图使用的是baike为二级目录。
location /二级目录/ {
index index.html index.php;
if (-f $request_filename/index.html){
rewrite (.*) $1/index.html break;
}
if (-f $request_filename/index.php){
rewrite (.*) $1/index.php;
}
if (!-f $request_filename){
rewrite (.*) /二级目录/index.php;
}
}

3、以上步骤都做好了,接下来就是引用这个伪静态了
操作方法,一次开开/usr/local/nginx/conf/
找到conf.conf文件。
在网站路径文件下root /home/wwwroot/baike/web$subdomain;
加一条include rewrite/51zc.conf; #rewrite end 就可以了。图片中的wp.conf为我自己的伪静态,因此你要使用改下就可以了。
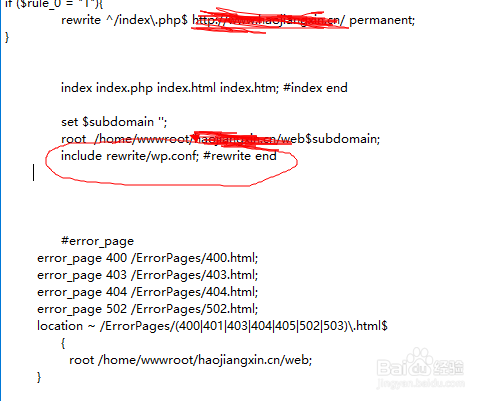
4、红色圈中include 这个路径就是从服务器首页开始一直到你的站点/二级目录/.htaccess;
wp.conf就是新建的wordpress博客伪静态。