提取windows聚焦图片作为桌面壁纸的方法
1、打开一个文本文件,复制以下代码,保存后缀为.ps1,命名为SetWallPaperFromSpotlight.ps1,然后右键“使用powershell运行”就可以发现桌面壁纸已经被设置为了最新的图片。所有的聚焦图片都被复制到你自己的用户文件夹下的Spotlight文件夹。比如我的是在:“C:\Users\Anymake\Pictures\Spotlight”。这样你就有了一个手动提取并设置最新图片为桌面壁纸的方法。下面第二步介绍每天电脑自动设置的方法。
2、# 将复制出来的缓存图片保存在下面的文件夹
add-type -AssemblyName System.Drawing
New-Item "$($env:USERPROFILE)\Pictures\Spotlight" -ItemType directory -Force;
New-Item "$($env:USERPROFILE)\Pictures\Spotlight\CopyAssets" -ItemType directory -Force;
New-Item "$($env:USERPROFILE)\Pictures\Spotlight\Horizontal" -ItemType directory -Force;
New-Item "$($env:USERPROFILE)\Pictures\Spotlight\Vertical" -ItemType directory -Force;
# 将横竖图片分别复制到对应的两个文件夹
foreach($file in (Get-Item "$($env:LOCALAPPDATA)\Packages\Microsoft.Windows.ContentDeliveryManager_cw5n1h2txyewy\LocalState\Assets\*"))
{
if ((Get-Item $file).length -lt 100kb) { continue }
Copy-Item $file.FullName "$($env:USERPROFILE)\Pictures\Spotlight\CopyAssets\$($file.Name).jpg";
}
foreach($newfile in (Get-Item "$($env:USERPROFILE)\Pictures\Spotlight\CopyAssets\*"))
{
$image = New-Object -comObject WIA.ImageFile;
$image.LoadFile($newfile.FullName);
if($image.Width.ToString() -eq "1920"){ Move-Item $newfile.FullName "$($env:USERPROFILE)\Pictures\Spotlight\Horizontal" -Force; }
elseif($image.Width.ToString() -eq "1080"){ Move-Item $newfile.FullName "$($env:USERPROFILE)\Pictures\Spotlight\Vertical" -Force; }
}
# 壁纸设置函数
function Set-Wallpaper
{
param(
[Parameter(Mandatory=$true)]
$Path,
[ValidateSet('Center', 'Stretch')]
$Style = 'Center'
)
Add-Type @"
using System;
using System.Runtime.InteropServices;
using Microsoft.Win32;
namespace Wallpaper
{
public enum Style : int
{
Center, Stretch
}
public class Setter {
public const int SetDesktopWallpaper = 20;
public const int UpdateIniFile = 0x01;
public const int SendWinIniChange = 0x02;
[DllImport("user32.dll", SetLastError = true, CharSet = CharSet.Auto)]
private static extern int SystemParametersInfo (int uAction, int uParam, string lpvParam, int fuWinIni);
public static void SetWallpaper ( string path, Wallpaper.Style style ) {
SystemParametersInfo( SetDesktopWallpaper, 0, path, UpdateIniFile | SendWinIniChange );
RegistryKey key = Registry.CurrentUser.OpenSubKey("Control Panel\\Desktop", true);
switch( style )
{
case Style.Stretch :
key.SetValue(@"WallpaperStyle", "2") ;
key.SetValue(@"TileWallpaper", "0") ;
break;
case Style.Center :
key.SetValue(@"WallpaperStyle", "1") ;
key.SetValue(@"TileWallpaper", "0") ;
break;
}
key.Close();
}
}
}
"@
[Wallpaper.Setter]::SetWallpaper( $Path, $Style )
}
$filePath = "$($env:USERPROFILE)\Pictures\Spotlight\Horizontal\*"
$file = Get-Item -Path $filePath | Sort-Object -Property LastWriteTime -Descending | Select-Object -First 1
Set-Wallpaper -Path $file.FullName
# echo $file.FullName
Remove-Item "$($env:USERPROFILE)\Pictures\Spotlight\CopyAssets\*";
#pause
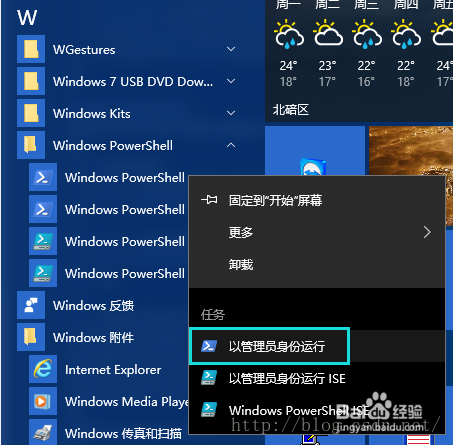
3、必须以管理员身份登录才能执行这些步骤。如果不是以管理员身份登录,则您仅能更改适用于您的用户帐户的设置。
由于windows默认的任务计划没有权限执行ps1脚本,因此首先需要用管理员运行Windows PowerShell
4、输入 Set-ExecutionPolicy Unrestricted进行权限更改,输入Y确认

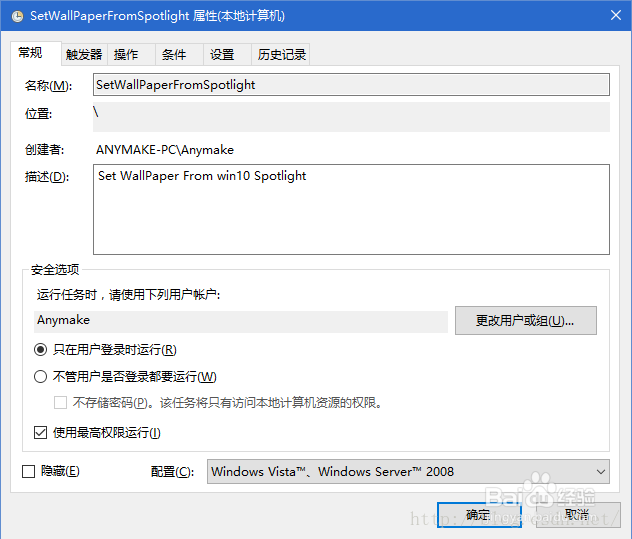
5、打开“任务计划程序”,方法是依次单击“控制面板”、“系统和安全性”、“管理工具”,然后双击“任务计划程序”。 需要管理员权限 如果系统提示您输入管理员密码或进行确认,请键入该密码或提供确认。单击“操作”菜单,然后单击“创建任务”。配置如下:
常规:键入任务的名称比如SetWallPaperFromSpotlight和描述(可选) - 勾选“使用最高权限运行”
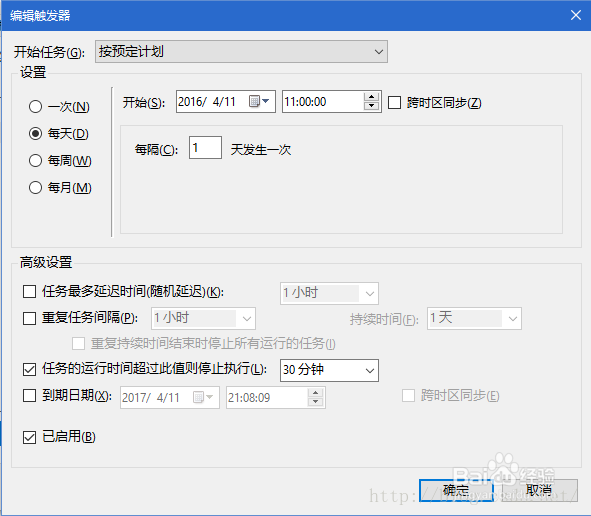
6、触发器:新建 - 选择“制定计划时” - 选择 执行时间如“7:30:00” - 选择执行周期如“每天 每隔1天发生一次” - 勾选"启用",也可以根据需要选择每小时,每半小时或者更高的频率运行脚本。
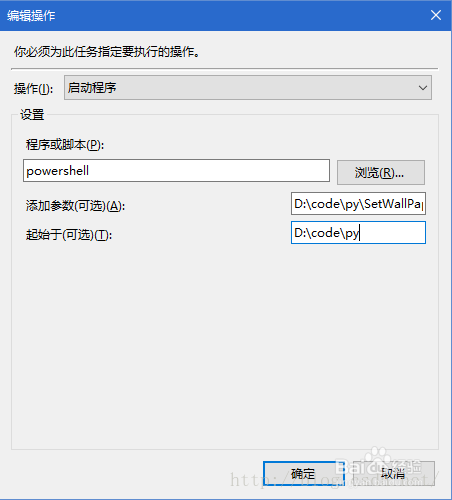
7、操作:新建 - 选择“启动程序” - "powershell" ,添加参数为文件路径,如"D:\code\py\SetWallPaperFromSpotlight.ps1",- 点击“确定”
8、所有完成就大功告成了,要检查效果的话,单机左侧的任务计划程序库,从右边找到你刚设置的SetWallPaperFromSpotlight任务,右键立即运行就可以看到效果了。