java实现文件复制功能
1、第一步骤:创建一个java项目。
1、file--》new--》project...或者Model...打开创建窗口
2、输入项目名称“copyFile”--》finish完成
3、项目结果如下所示:


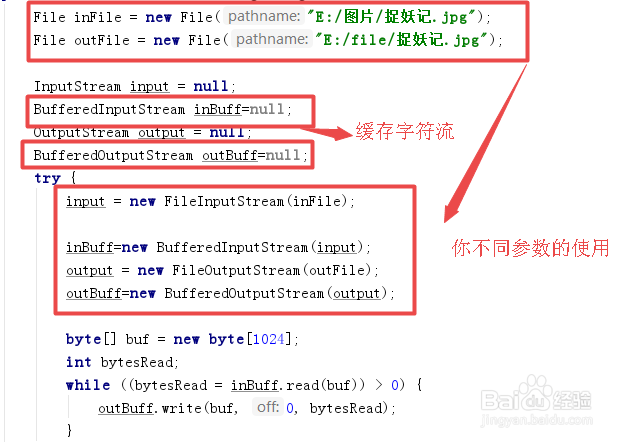
2、第二步骤:使用java的FileStreams复制。
特点是对于只向的文件如果不存在则直接创建,如果存在直接覆盖
完整代码如下所示:
引入架包:
import java.io.*;
import java.nio.channels.FileChannel;
public static void testFileStreams(){
FileInputStream fls = null;//创建文件输入
FileOutputStream fos = null;
// 创建文件输出流
try {
fls = new FileInputStream("E:/图片/捉妖记.jpg");
fos = new FileOutputStream("E:/file/捉妖记.jpg");
} catch (FileNotFoundException e) {
e.printStackTrace();
}
// 边输入边输出(准备数组和temp)
byte[] bytes = new byte[1024];
//以1KB的速度
int temp = 0;
try {
//循环输入
while((temp=fls.read(bytes)) != -1){
try {
//写入输出
fos.write(bytes,0,temp);
} catch (IOException e) {
e.printStackTrace();
}
}
//刷新输出流
fos.flush();
// 关闭输入输出流
fls.close();
fos.close();
} catch (IOException e) {
e.printStackTrace();
}
}

3、第三步骤:使用Java的FileChannel复制。
FileChannel的实例实际上还是FileStreams,不过对其进行了包装性能上更高一下,也更加方便一点。
代码如下:
引入架包:
import java.io.*;
import java.nio.channels.FileChannel;
public static void testFileChannel(){
File inFile = new File("E:/图片/捉妖记.jpg");
File outFile = new File("E:/file/捉妖记.jpg");
FileChannel inputChannel = null;
FileChannel outputChannel = null; t
ry {
inputChannel = new FileInputStream(inFile).getChannel();
outputChannel = new FileOutputStream(outFile).getChannel();
outputChannel.transferFrom(inputChannel, 0, inputChannel.size());
} catch (FileNotFoundException e) {
e.printStackTrace();
} catch (IOException e) {
e.printStackTrace();
} finally {
try {
inputChannel.close();
} catch (IOException e) {
e.printStackTrace();
}
try {
outputChannel.close();
} catch (IOException e) {
e.printStackTrace();
}
}}

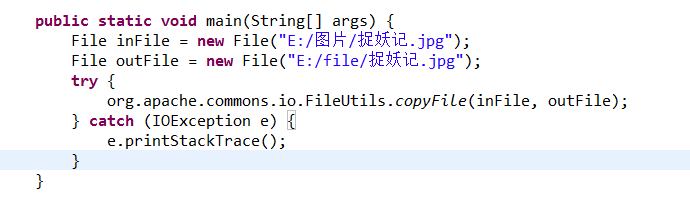
4、第四步骤:使用Apache的文件工具类FileUtils。
这个使用更加简单,但是需要添加tomcat的架包依赖commons-io.jar。
public static void main(String[] args) {
File inFile = new File("E:/图片/捉妖记.jpg");
File outFile = new File("E:/file/捉妖记.jpg");
try {
org.apache.commons.io.FileUtils.copyFile(inFile, outFile);
} catch (IOException e) {
e.printStackTrace();
}
}

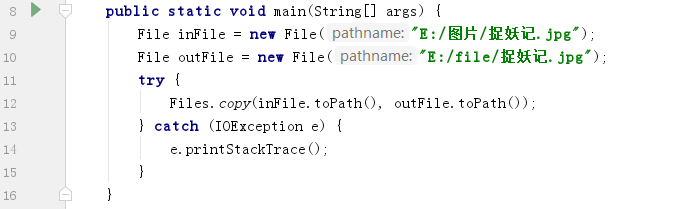
5、第五步骤:使用jdk提供的Files
引入架包:
import java.io.*;
import java.nio.file.Files;
这个需要jdk1.7以上版本才能支持
public static void main(String[] args) {
File inFile = new File("E:/图片/捉妖记.jpg");
File outFile = new File("E:/file/捉妖记.jpg");
try {
Files.copy(inFile.toPath(), outFile.toPath());
} catch (IOException e) {
e.printStackTrace();
}}