Delft3D结构网格应用之Grid design sample
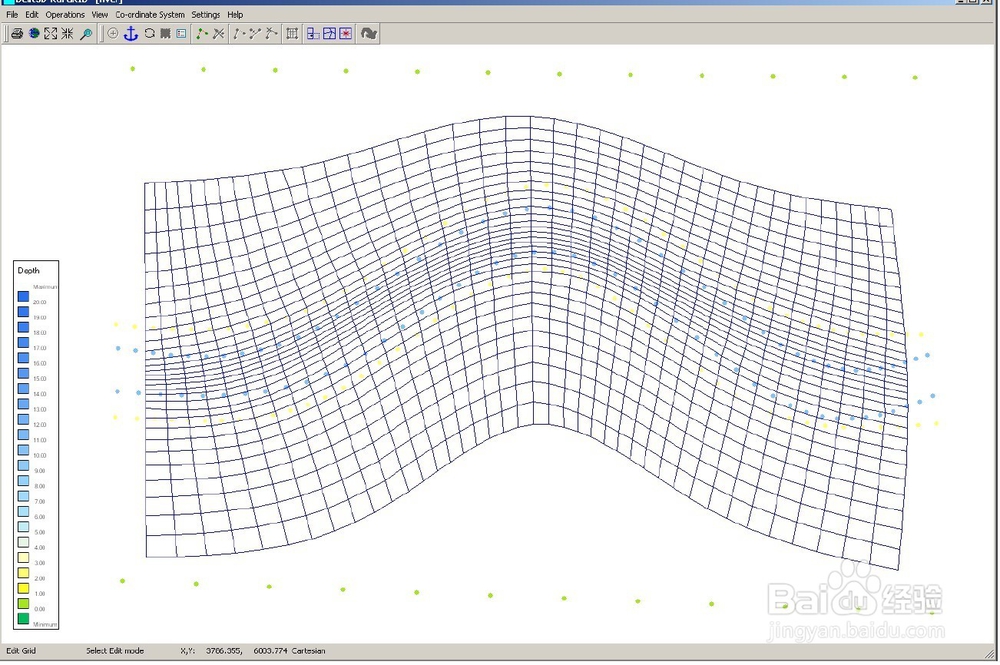
1、在这个例子中,将展示给大家如何根据水深点来对网格进行局部加密,其完成实例如图所示。
该经验仍然以Delft3D自带的示例为主
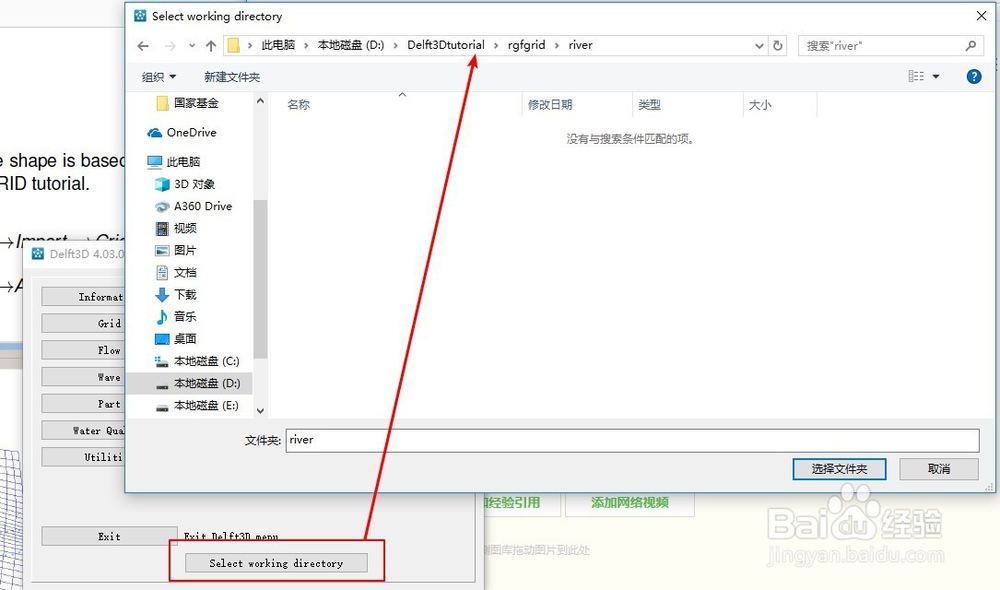
2、步骤一:
启动RGFGRID(网格生成器),并将工作空间设置到<river>。
3、步骤二:
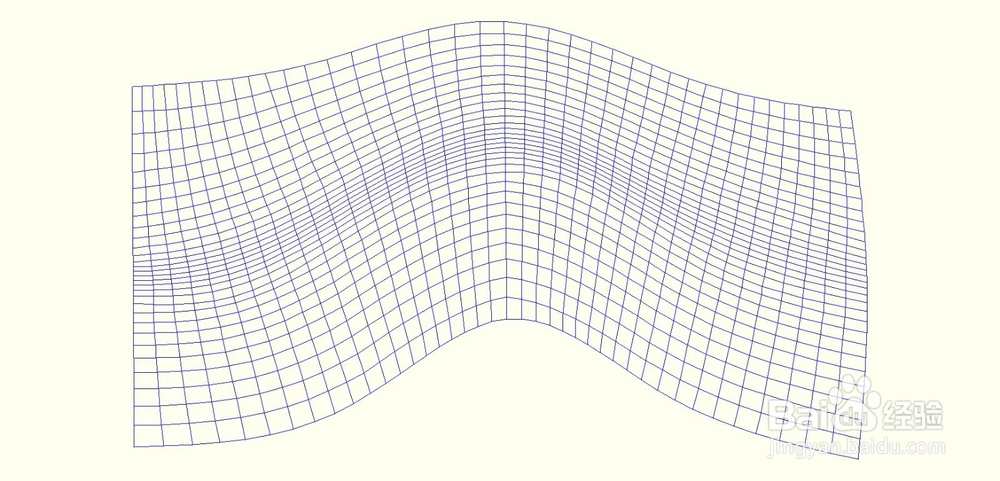
打开已有网格<river.grd>
打开过程:file——import——grid(RGFgrid)
界面如图。
4、步骤三:
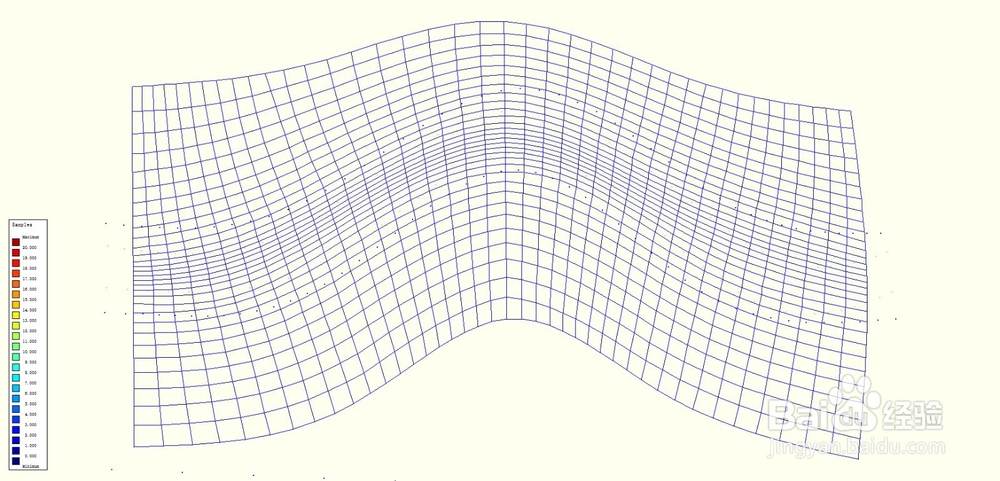
打开水深点文件<river.xyz>
打开过程:file——attribute files——open sample
打开后界面如下图所示。
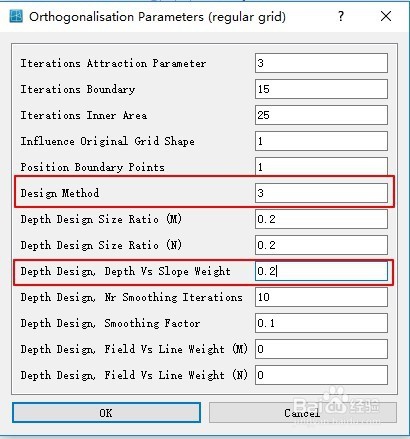
5、步骤四:
在设置菜单设置网格设计方法:
在setting菜单栏——单击orthogonalisation(regular)
在界面设置design method值为3
Depth Design, Depth vs.Slope Weight为“0.2”
完成OK。
如下图。
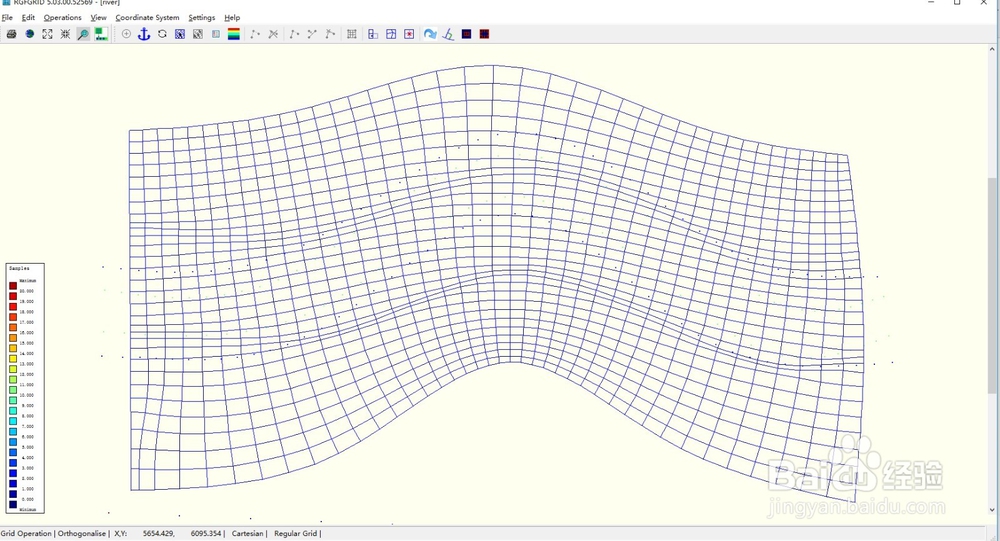
6、步骤五:
在operations 菜单里,单击orthogonalise grid、
就可以看到结果。
如图所示。
之后导出网格,关闭窗口即可。
1、先设置工作空间,粘贴网格的工作文件夹名字为<Paste_Passive_Grid_to_Grid>

2、首先打开需要粘贴在一起的网格,打开过程往上参考,不在啰嗦。
要注意的是,粘贴网格需要打开多个网格。
这里直接打开<fti_02_north.grd> 和 <fti_02_south.grd 这两个网格
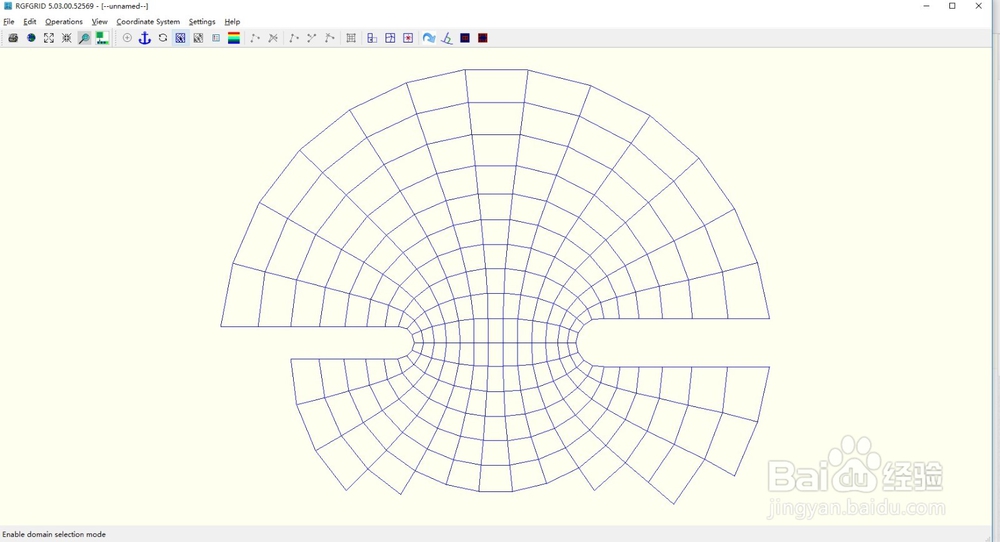
打开之后的界面如下图。

3、打开之后,直接在operations菜单里,选择单击grid——paste two grid。
这时候两个网格就可以变成一个网格。
如图。
声明:本网站引用、摘录或转载内容仅供网站访问者交流或参考,不代表本站立场,如存在版权或非法内容,请联系站长删除,联系邮箱:site.kefu@qq.com。
阅读量:64
阅读量:118
阅读量:70
阅读量:138
阅读量:47