Unity3D调用C++中Dll文件
1、可以先详细了解下“c#调用C++ DLL文件”。完成VS2013实现C++ DLL文件的创建方法。
2、了解了C++ dll创建方法后,制作一个C++ dll文件。
其源代码:
在“.def”文件中添加代码:
LIBRARY
EXPORTS
mySum
在“.cpp”文件中添加代码:
//宏定义
#define LIBEXPORT_API extern "C" __declspec(dllexport)
//设置函数
LIBEXPORT_API int __stdcall mySum(int a, int b)
{
return a + b;
}
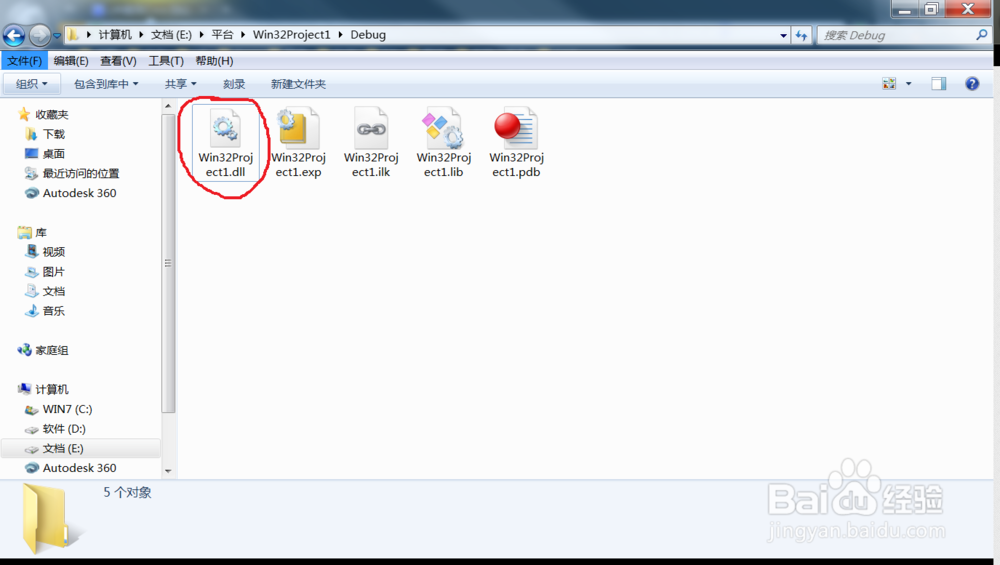
编译后生成.dll文件
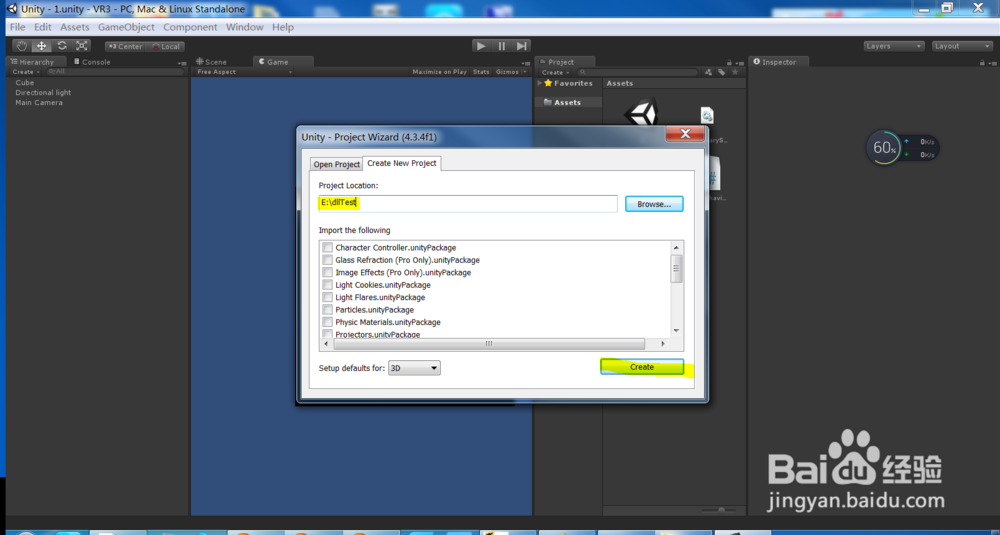
3、新建Unity3D游戏,起好游戏工程名后,点击创建。
4、在你的unity工程的assert文件夹下创建名为Plugins的文件夹,并把C++编译后生成.dll文件拷贝到该文件夹下。拷贝后unity3d会自动生成一个副本,不用管。

5、创建一个C#脚本,本例采用默认脚本名NewBehaviourScript
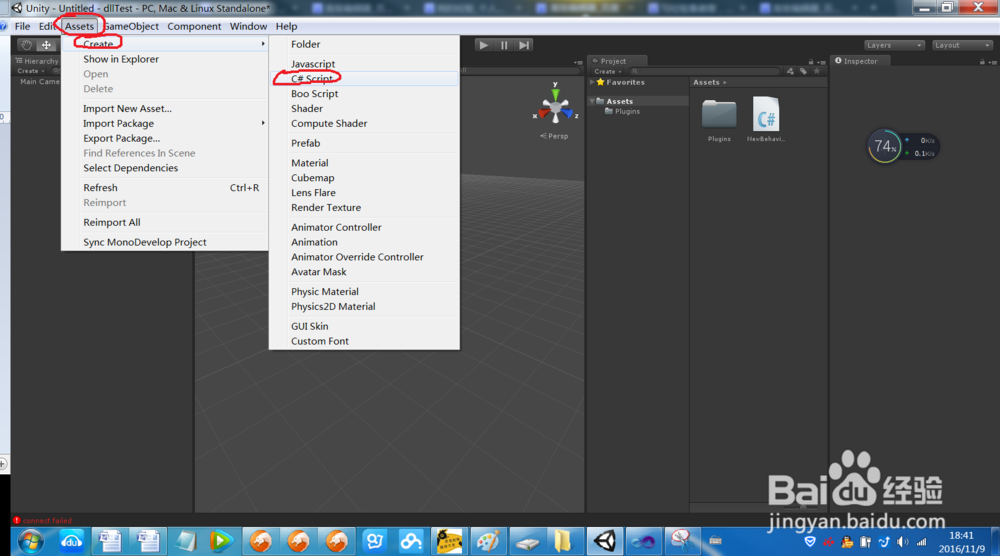
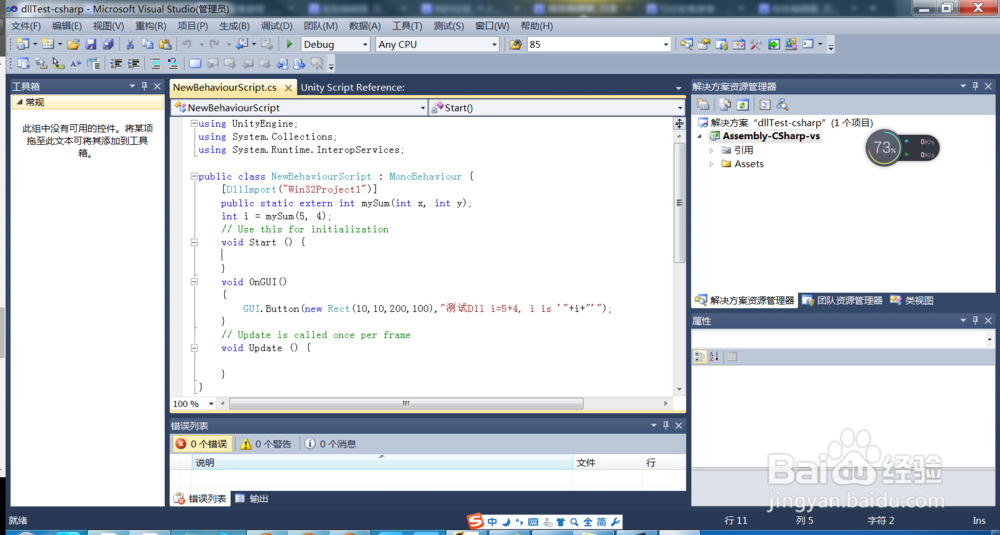
6、修改NewBehaviourScript源代码如下:
using UnityEngine;
using System.Collections;
using System.Runtime.InteropServices;
public class NewBehaviourScript : MonoBehaviour {
[DllImport("Win32Project1")]
public static extern int mySum(int x, int y);
int i = mySum(5, 4);
// Use this for initialization
void Start () {
}
void OnGUI()
{
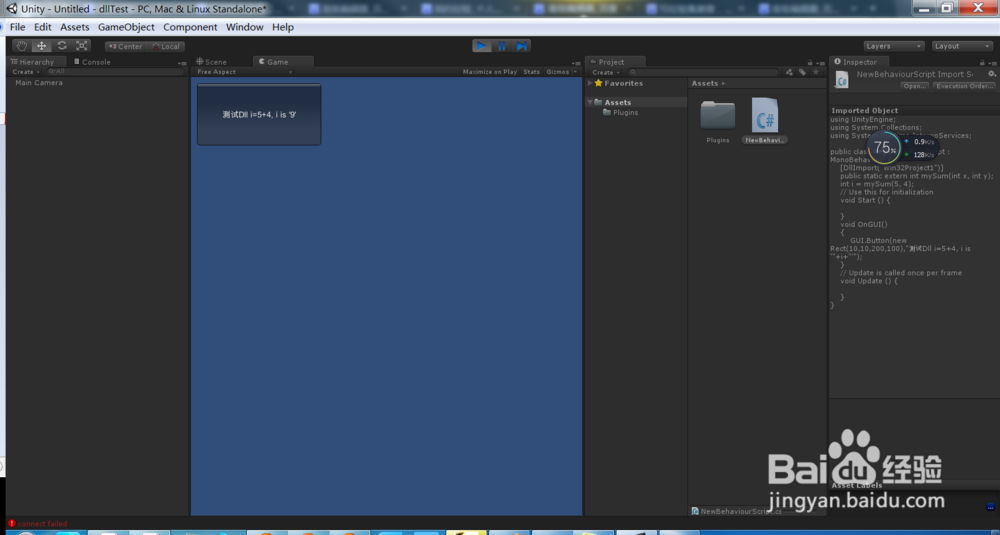
GUI.Button(new Rect(10,10,200,100),"测试Dll i=5+4, i is '"+i+"'");
}
// Update is called once per frame
void Update () {
}
}
7、修改完编译代码,编译后进行测试,将脚本拖到主摄像机中,运行游戏后可以看到如下界面,说明Unity3D调用C++ DLL文件成功。