android Dialog自定义开发
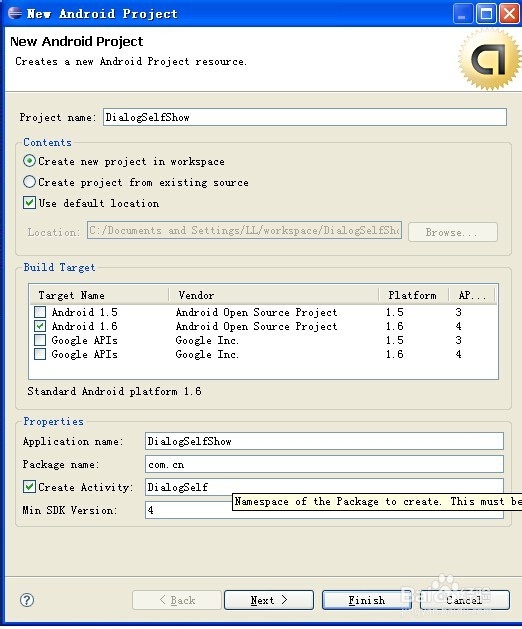
1、首先新建一个android项目,名字叫做DialogSelfShow,其余的参数,用户可以自己设置,点击完成,即可生成项目信息

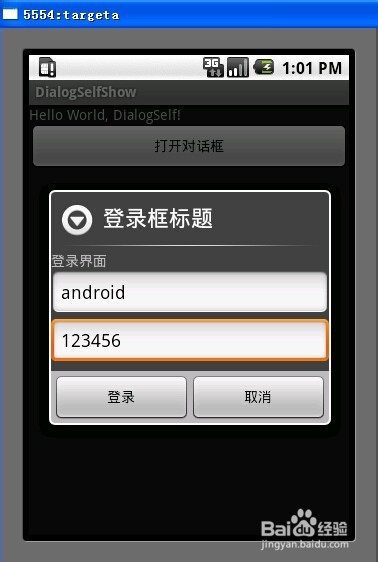
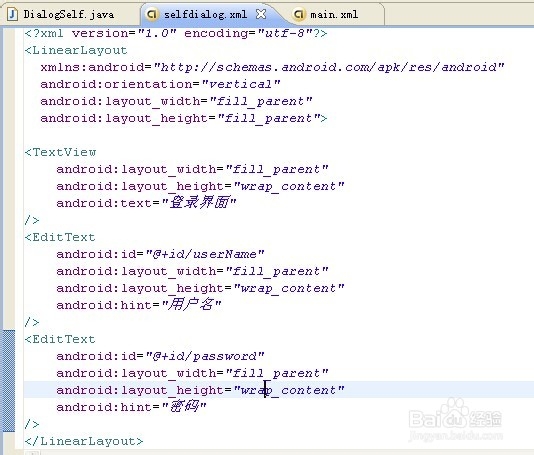
2、定义弹出框的布局文件样式,主要是声明两个EditText输入框信息和一个TextView文本展示信息。
<?xml version="1.0" encoding="utf-8"?>
<LinearLayout
xmlns:android="http://schemas.android.com/apk/res/android"
android:orientation="vertical"
android:layout_width="fill_parent"
android:layout_height="fill_parent">
<TextView
android:layout_width="fill_parent"
android:layout_height="wrap_content"
android:text="登录界面"
/>
<EditText
android:id="@+id/userName"
android:layout_width="fill_parent"
android:layout_height="wrap_content"
android:hint="用户名"
/>
<EditText
android:id="@+id/password"
android:layout_width="fill_parent"
android:layout_height="wrap_content"
android:hint="密码"
/>
</LinearLayout>
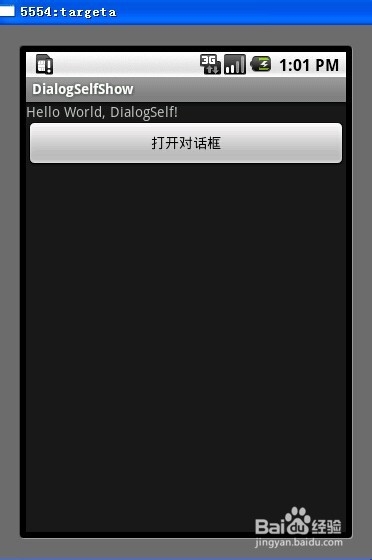
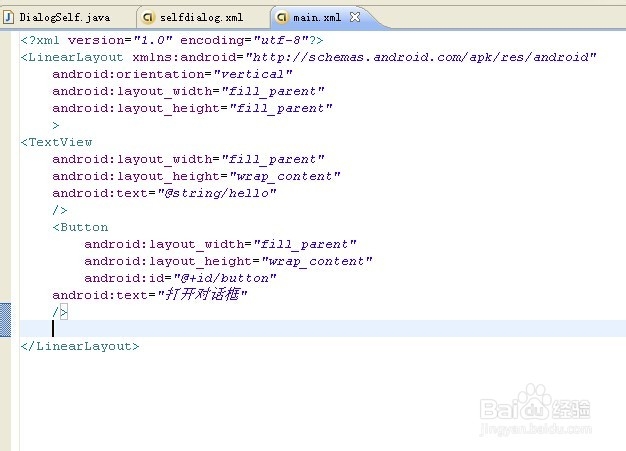
3、在main.xml中定义一个按钮,作为打开对话框的开关。
<Button
android:layout_width="fill_parent"
android:layout_height="wrap_content"
android:id="@+id/button"
android:text="打开对话框"
/>
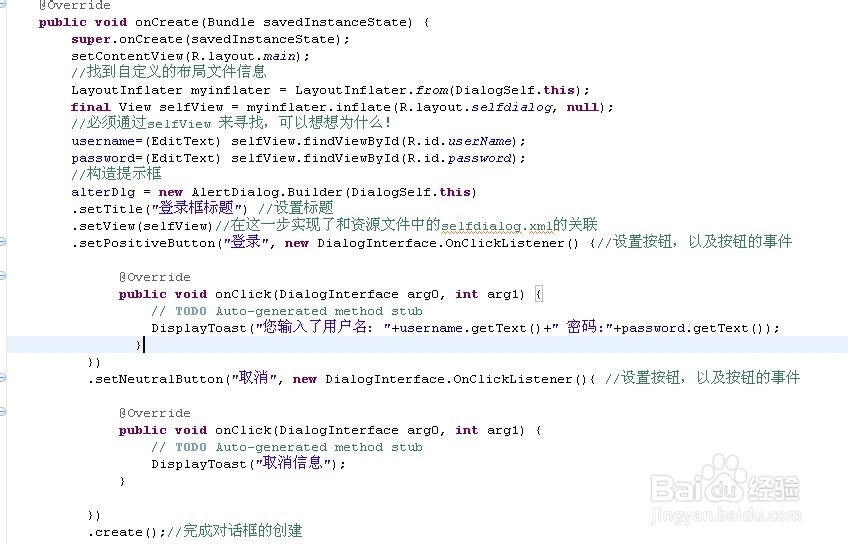
4、进行主体函数功能编写。
//找到自定义的布局文件信息
LayoutInflater myinflater = LayoutInflater.from(DialogSelf.this);
final View selfView = myinflater.inflate(R.layout.selfdialog, null);
//必须通过selfView 来寻找,可以想想为什么!
username=(EditText) selfView.findViewById(R.id.userName);
password=(EditText) selfView.findViewById(R.id.password);
//构造提示框
alterDlg = new AlertDialog.Builder(DialogSelf.this)
.setTitle("登录框标题") //设置标题
.setView(selfView)//在这一步实现了和资源文件中的selfdialog.xml的关联
.setPositiveButton("登录", new DialogInterface.OnClickListener() {//设置按钮,以及按钮的事件
@Override
public void onClick(DialogInterface arg0, int arg1) {
// TODO Auto-generated method stub
DisplayToast("您输入了用户名:"+username.getText()+" 密码:"+password.getText());
}
})
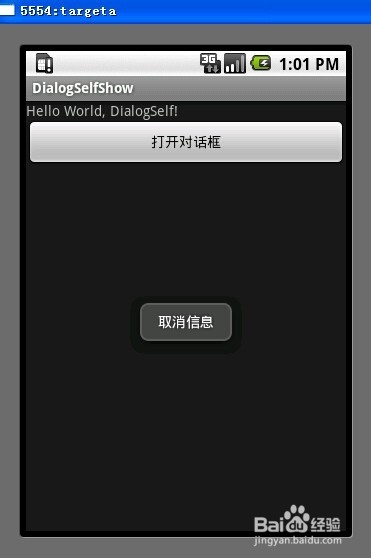
.setNeutralButton("取消", new DialogInterface.OnClickListener(){ //设置按钮,以及按钮的事件
@Override
public void onClick(DialogInterface arg0, int arg1) {
// TODO Auto-generated method stub
DisplayToast("取消信息");
}
})
.create();//完成对话框的创建
5、 //按钮的响应事件 打开对话框
Button button1 = (Button)findViewById(R.id.button);
button1.setOnClickListener(new Button.OnClickListener(){
@Override
public void onClick(View v) {
// TODO Auto-generated method stub
alterDlg.show();
}
});
//以及相应的提示信息展示
/* 显示Toast */
public void DisplayToast(String str)
{
Toast toast = Toast.makeText(this, str, Toast.LENGTH_LONG);
//设置toast显示的位置
toast.setGravity(Gravity.TOP, 0, 220);
//显示该Toast
toast.show();
}

6、好了,大功告成,运行下程序,看看结果